


A Guide to Installing Linux Mint on Windows
Linux Mint is a popular and user-friendly Linux distribution (or “distro”) based on the Ubuntu and Debian operating systems. It’s designed to provide a user-friendly and familiar computing experience, making it an excellent choice for those transitioning from other operating systems, such as Windows. In this guide we will take you step-by-step with the installation process for VirtualBox on Windows.
What is VirtualBox?
Oracle VM VirtualBox, commonly referred to as VirtualBox, is a powerful and free, open-source virtualization software that can be installed on Windows and allows you to create and run multiple virtual machines (VMs) on a single physical computer.
This guide assumes you have VirtualBox already installed on your Windows system. If you do not already have VirtualBox, you can download it here: VirtualBox
Why Choose Linux Mint?
Linux Mint has a look and feel that is very close to Windows desktops so it’s a great choice for beginners to Linux.
Here are some key features of Linux Mint:
User-Friendly Interface: Linux Mint features a user-friendly desktop environment, often using Cinnamon or MATE, which resembles traditional desktop layouts and is comfortable for users coming from Windows.
Stability: It’s known for its stability, as it’s based on Ubuntu LTS releases, ensuring long-term support and reliability.
Software Manager: Linux Mint includes a Software Manager that simplifies the installation and management of software and packages, making it easy for users to find and install applications.
Out-of-the-Box Multimedia Support: It comes with support for various multimedia codecs, allowing users to play a wide range of media files without additional setup.
Customization: Linux Mint provides numerous customization options for themes, desktop layouts, and applets to tailor the user experience to individual preferences.
Community and Support: The Linux Mint community is active and supportive, offering forums and resources for users to seek assistance and share their experiences.
Variety of Editions: Linux Mint offers different editions, including the Cinnamon, MATE, and Xfce desktop environments, giving users options to choose the one that best suits their hardware and preferences.
Compatibility: It is compatible with a wide range of software applications available for Linux, and its Ubuntu base ensures access to a vast repository of software.
Download Linux Mint
At the time of writing this post, the most popular version of Linux Mint is the Cinnamon edition.
You can download it here: Linux Mint
The download may take a while its 2.49GiB. Once download completes you can proceed.
Creating a new Virtual Machine
Creating the Virtual Machine (VM) is a simple process, just follow these steps:
- Open VirtualBox and Select New, to begin creating a new VM.

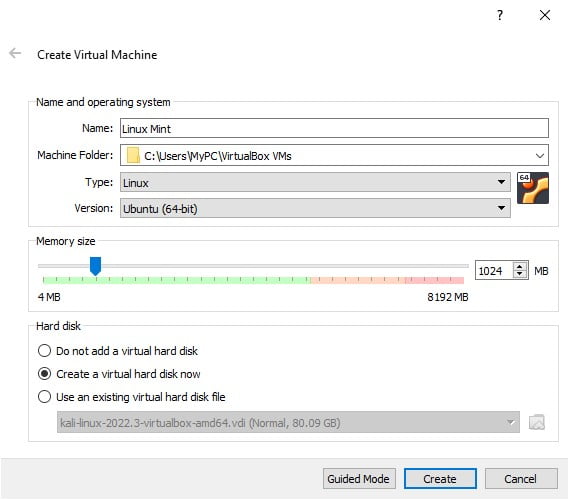
Name and operating system
- Name it as Linux Mint. Naming it this way automatically selects the correct type and version.
- Machine folder should be wherever you store your Virtual machines, if this is your first Virtual machine, then choose a memorable location.
Memory Size
- Set the memory size how you want, just make sure it’s above 1024 and in the green.
Hard disk
- Make sure the Hard disk is set to Create a virtual hard disk now then click Create.
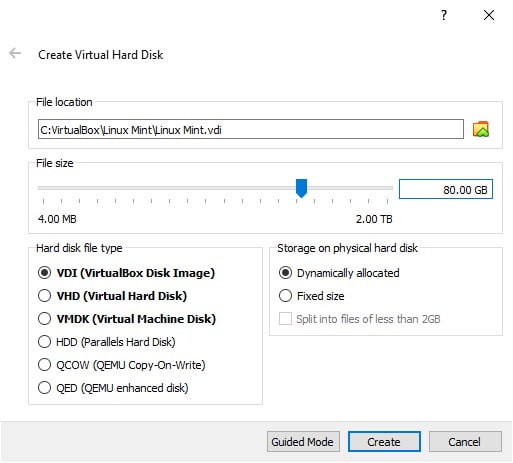
Create Virtual Hard Disk
File size
- The File size needs to be at least 25GiB. If you’re going to be doing work on your machine, then give it between 80-100GiB or more if you wish.
Hard disk file type
- Set Hard disk file type to: VDI (VirtualBox Disk Image)
Storage on physical hard disk
- Set Storage on physical hard disk to: Dynamically allocated. This way it won’t take storage space until it needs too.
Now click Create.
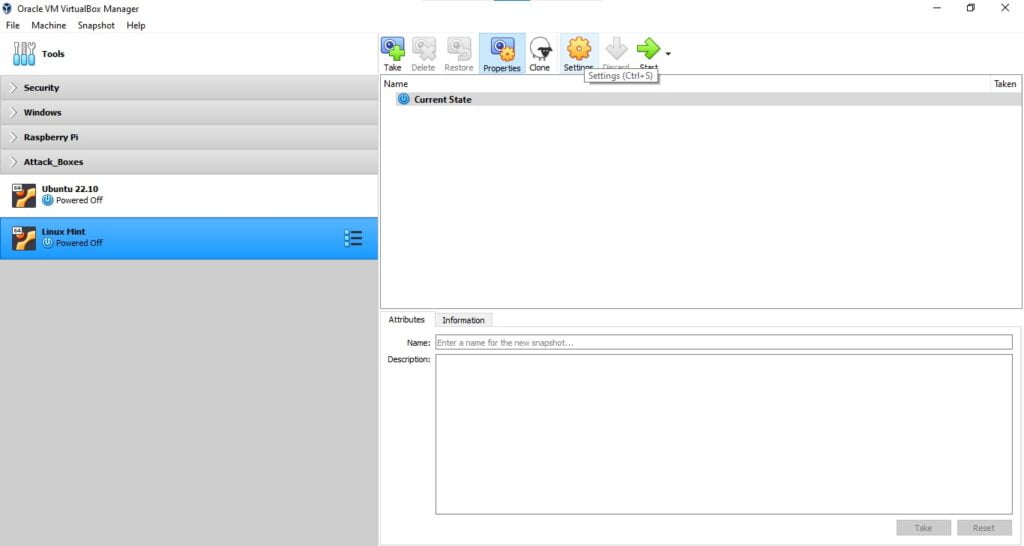
Preparing the new VM
- Make sure Linux Mint is highlighted on the left then click on the settings tab.
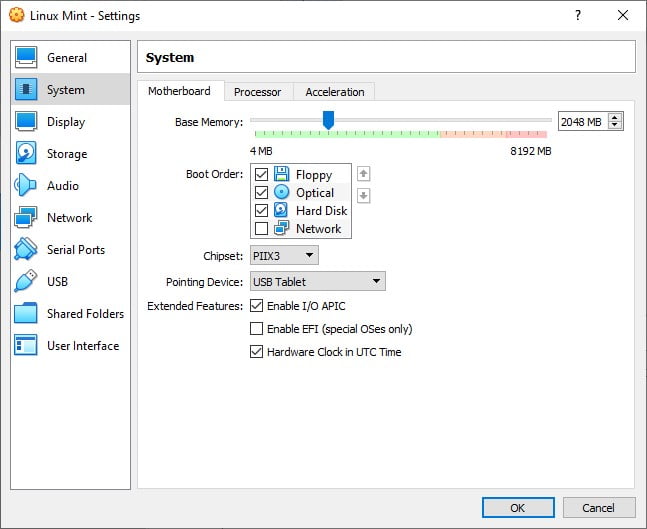
System Settings
Motherboard Settings
- Go to System Settings > Motherboard. Give base memory a minimum of 1024MB, your system may have plenty spare so give as much as you want but 4096MB is more than enough.
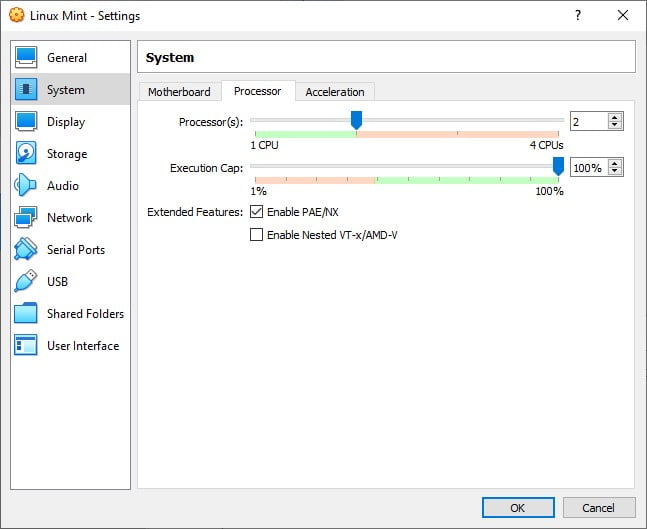
Processor Settings
- Go to System Settings > Processor.
Here you can select how many processors you want to dedicate to Linux Mint. Depending on your system give it a minimum of 2 or more.
In the Extended Features:
- Check the box for Enable PAE/NX.
PAE enables processors to access more than 4 GB of physical memory on capable versions of Windows and is a prerequisite for NX. NX allows the processor to help guard the PC from attacks by malicious software.
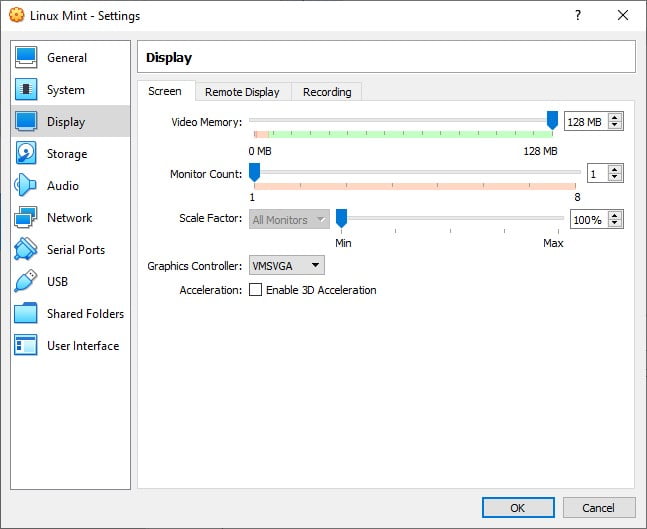
Display Settings
- Go to Display Settings > Screen.
- Set Video Memory to: 128MB.
- Set Graphics Controller to: VMSVGA.
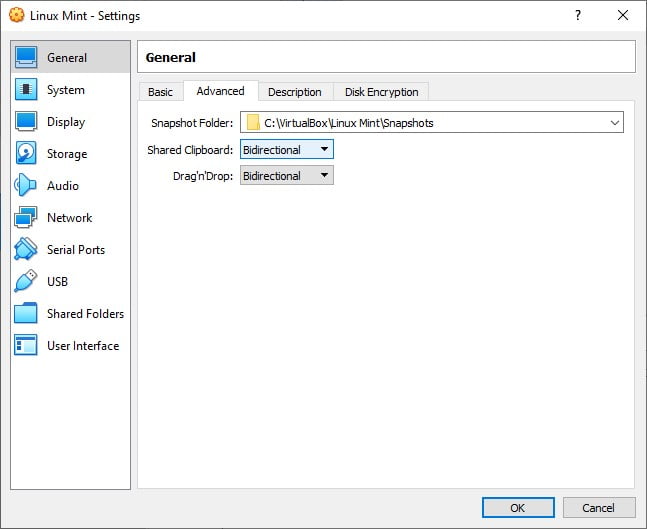
General Settings
This part is optional.
- Go to General > Advanced.
- Set Shared Clipboard to: Bidirectional.
- Set Drag’n’Drop to: Bidirectional.
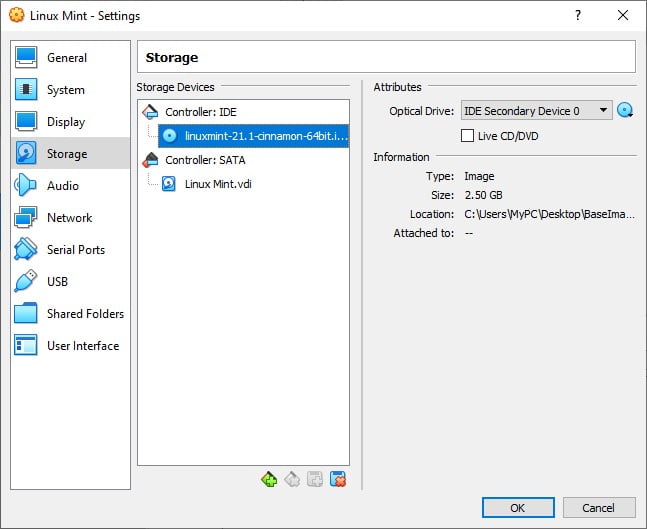
Storage Settings
Finally, we need to point the Virtual Machine to where the installer is located.
- Go to Storage Settings and single click “Empty” below Controller: IDE to highlight it.
- Now to the right, click on the disc under Attributes, select choose disk file, this will open a browser for you to locate and select the Linux Mint iso file you previously downloaded.
With the Installer in place, click OK.
Installation
Now you can press Start, to start the Linux Mint Virtual Machine and begin the installation process.
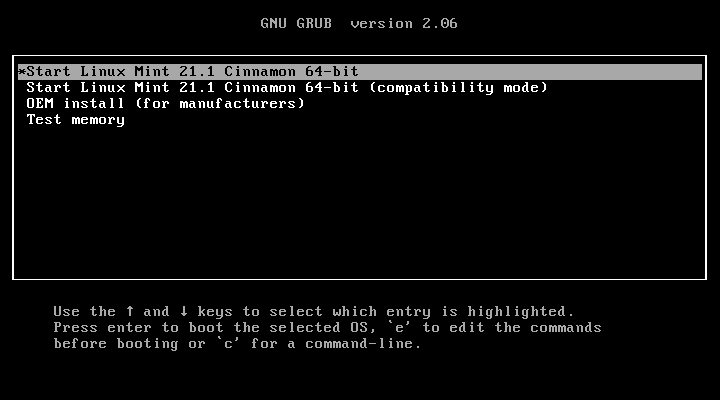
- Select Start Linux Mint 21.1 Cinnamon 64-bit.
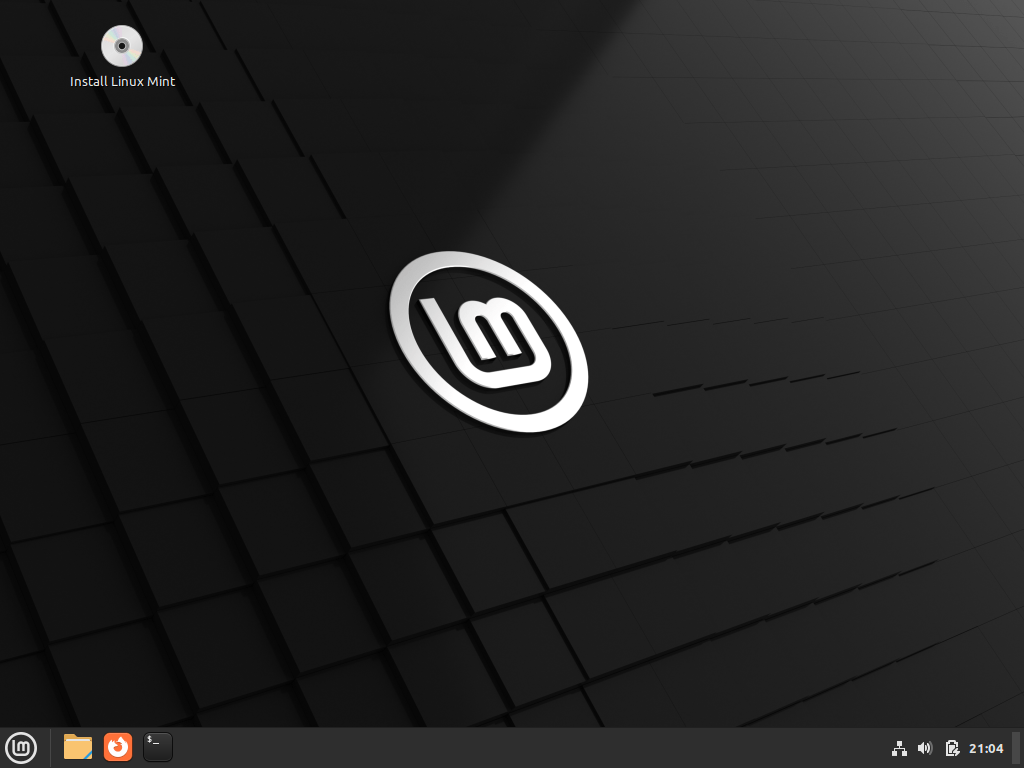
Once the process begins you will see the Linux Mint logo.

Once the basic Linux Mint appears:
- Double click Install Linux Mint
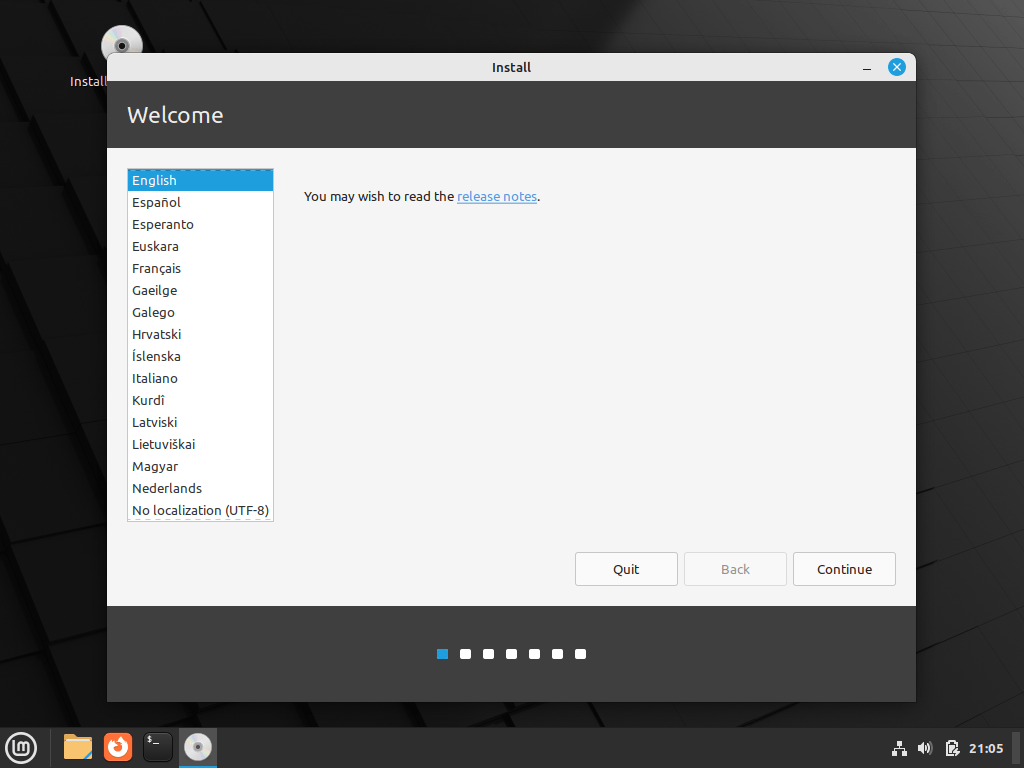
Linux Mint Installation Settings
Language Settings
- Select your language and click Continue.
Keyboard Layout Settings
- Choose your keyboard layout.
If unsure which layout you have, you can select Detect Keyboard Layout. This will ask for some input, but it will find your keyboard layout for you. Then select Continue.

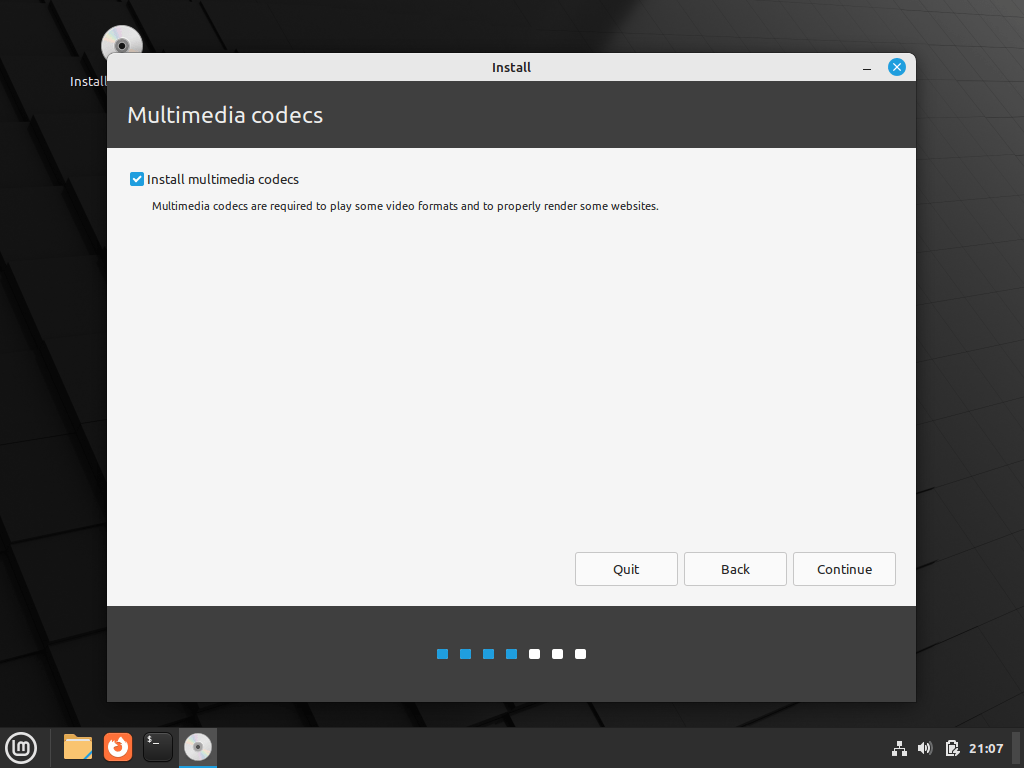
Multimedia Codec
- Tick the box for Install multimedia codecs and select Continue.
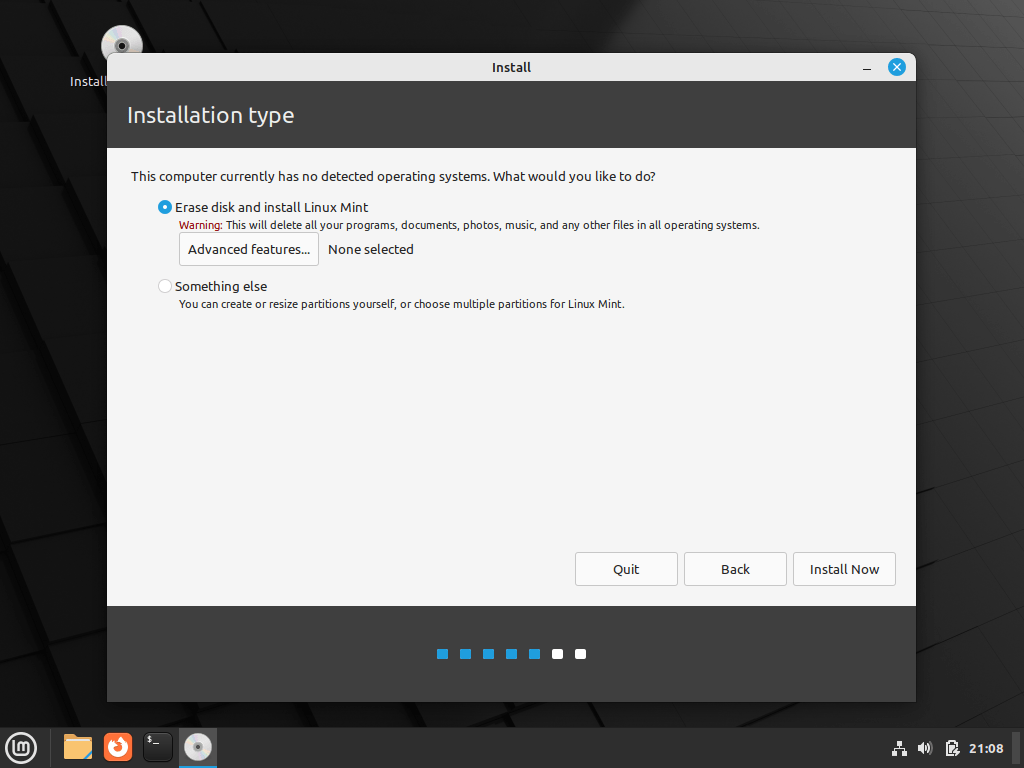
Installation Type
- Select Erase disk and install Linux Mint.
This will not affect your host system.
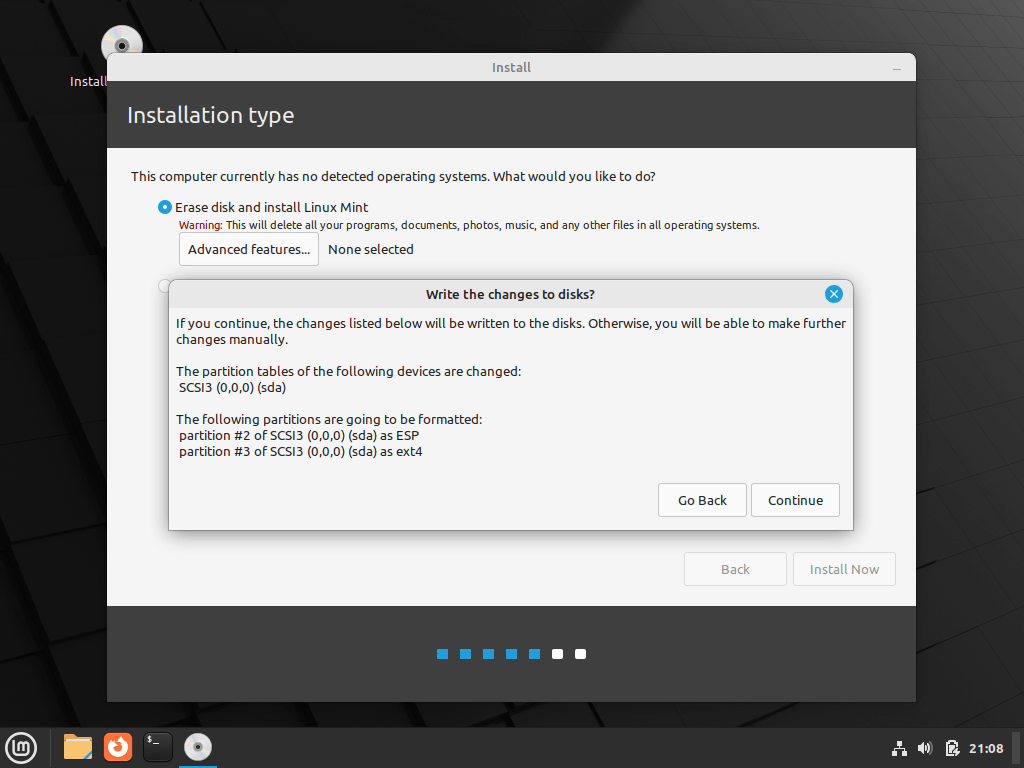
- Click Install Now.
Confirm the choice by selecting Continue.
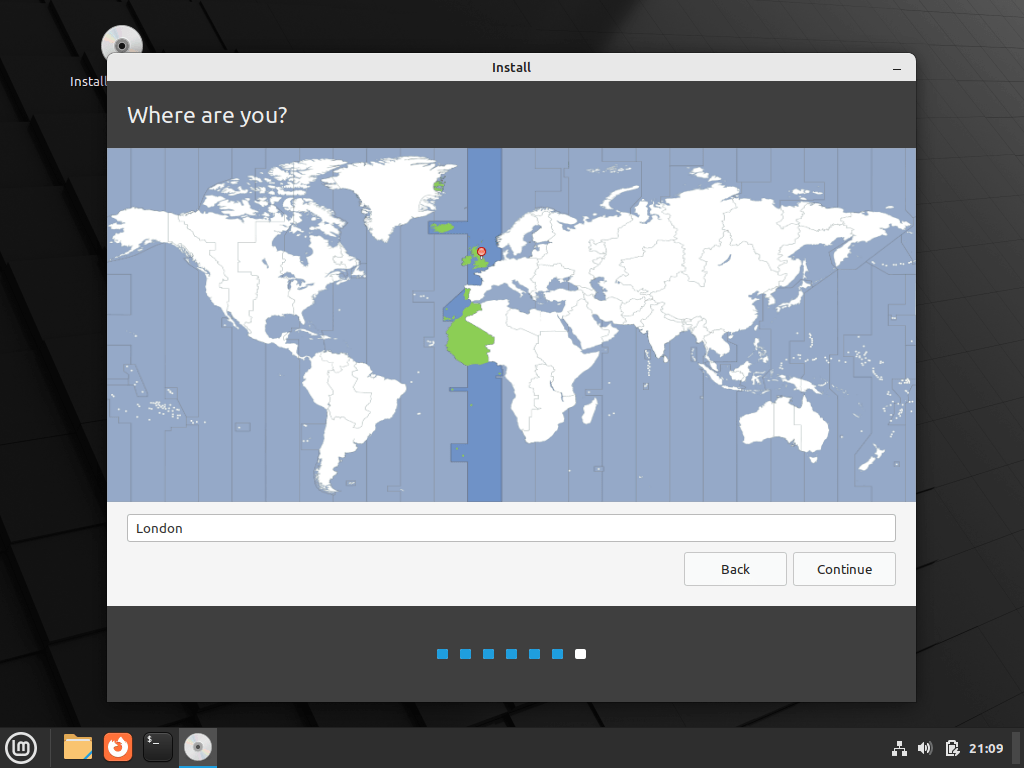
Regional Settings
- Select your region.
Linux Mint should have preselected it for you, but if not then just click where on the map you are.
- Now select Continue.
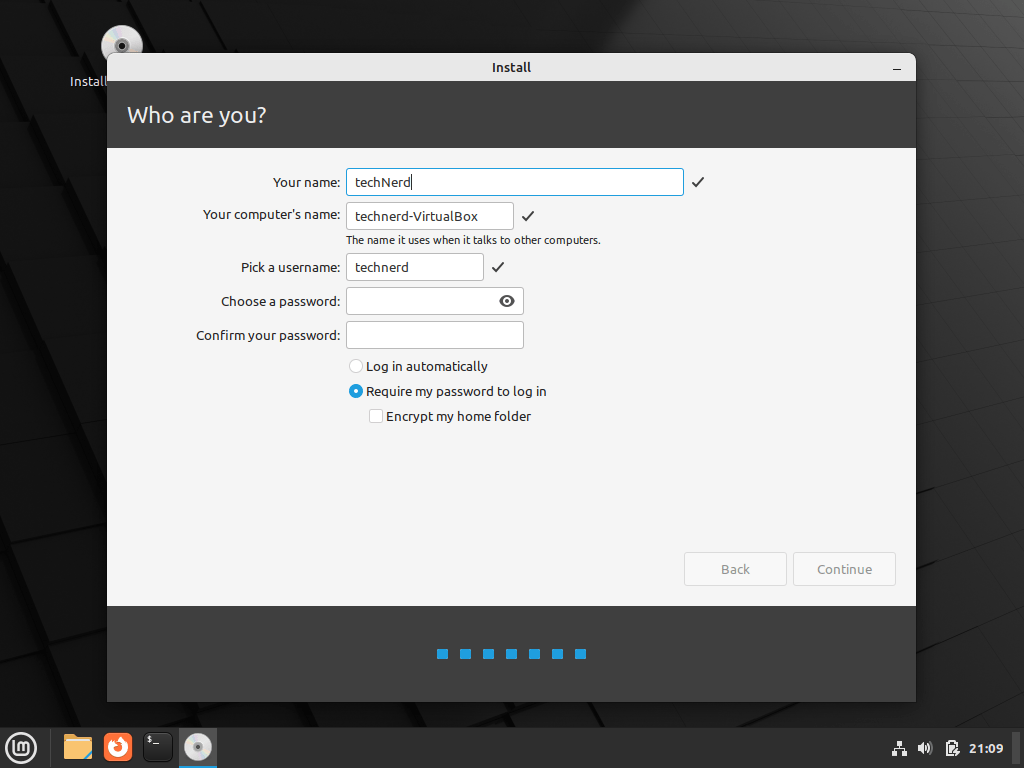
Personal Credentials
- Enter your name.
- Give your system a name.
- Choose a password.
- Choose whether you want automatic login.
- Choose if you require a password to log in.
Now select Continue.
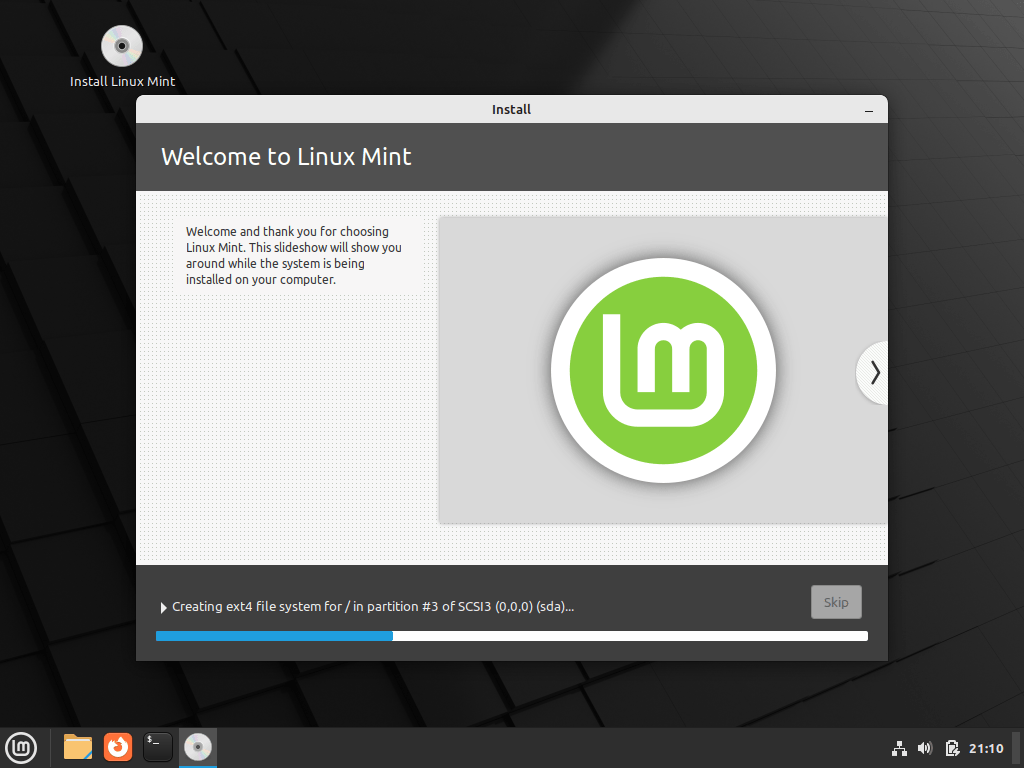
Linux Mint is now installing. Depending on your system, this can take a while.
Once you see the “Installation Complete” pop-up, select Restart Now.
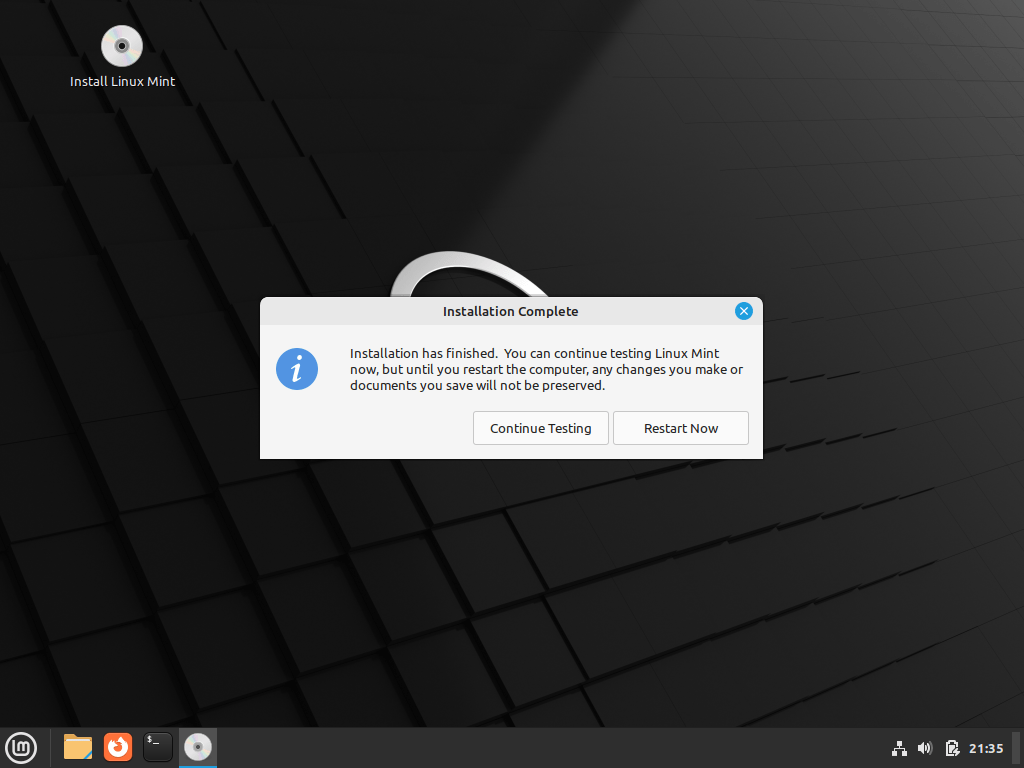
You should now have a fresh installation of Linux Mint.

Conclusion
Linux Mint has gained a significant following because of its focus on delivering a polished, user-friendly, and stable Linux experience. It is a suitable choice for beginners, as well as experienced Linux users who prefer a more traditional and intuitive desktop environment. Additionally, its out-of-the-box multimedia support and compatibility with Ubuntu software make it an attractive option for a wide range of users.
If this is your first time using a Linux system, why not take a look at our library of Linux Guides to help you get started: Linux Guides
That’s All Folks!

