
Raspberry Pi: How To Use Crontab
Related Articles

UK Amateur Radio Frequency Bands
In the UK, amateur radio enthusiasts, often referred to as “radio amateurs” or “hams,” are allocated specific frequency bands for…
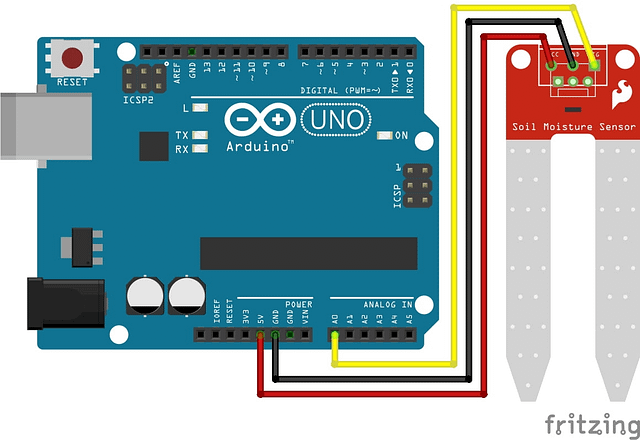
Soil Moisture Sensor with Arduino
Welcome to the World of Sensors and Modules with Arduino! The moisture sensor, also known as a soil moisture sensor,…
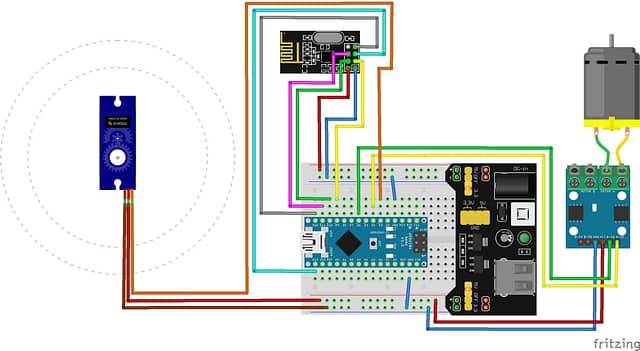
NRF24L01 Radio Controlled Arduino Project
Building our First Radio Controlled Arduino Project The NRF24L01 RF Module is a low-cost, high-performance 2.4GHz transceiver module widely used…