

What is a Light Dependent Resistor
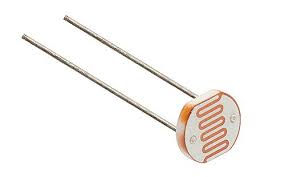
A Light Dependent Resistor (LDR), also known as a photoresistor, is a type of passive electronic component that changes its resistance in response to changes in light levels. The resistance of an LDR decreases as the intensity of light falling on it increases. Conversely, its resistance increases as the light level decreases. LDRs are commonly used in various applications to sense and control light levels.
Components
To use an LDR with an Arduino, you’ll need the following components:
- Arduino board (e.g., Arduino Uno, Arduino Nano).
- Light Dependent Resistor (LDR).
- Resistor (usually 10k ohms, but it can vary depending on your LDR).
- Breadboard and jumper wires.
Let's Build!
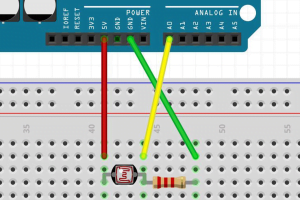
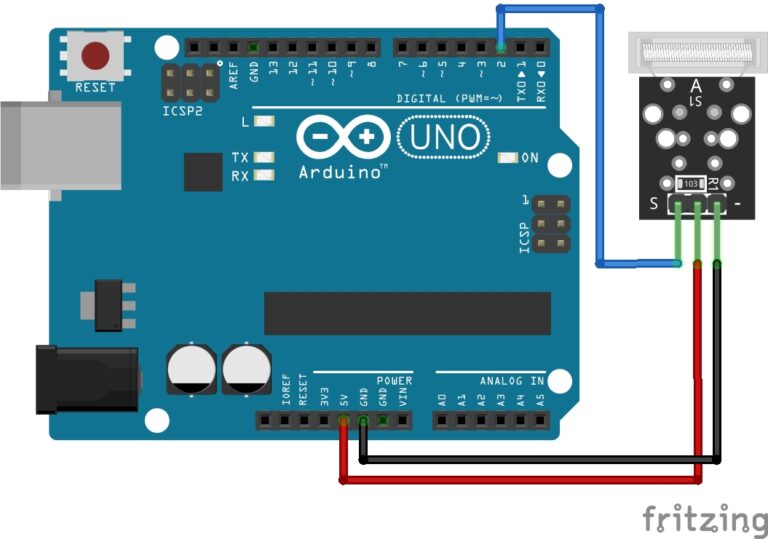
Wiring:
- Connect one leg of the LDR to the 5V output on the Arduino.
- Connect the other leg of the LDR to one leg of the resistor.
- Connect the other leg of the resistor to the ground (GND) on the Arduino.
- Connect the junction between the LDR and the resistor to one of the analog input pins on the Arduino (e.g., A0).
Programming:
You’ll need to write an Arduino sketch to read the analog value from the LDR and convert it into a meaningful light level. Here’s a basic example:
int LDR_Pin = A0; // The analog input pin where the LDR is connected

void setup() {
  Serial.begin(9600); // Initialize serial communication
}

void loop() {
  int sensorValue = analogRead(LDR_Pin); // Read the analog value from the LDR
  float voltage = sensorValue * (5.0 / 1023.0); // Convert analog value to voltage (assuming 5V reference)
  float resistance = (5.0 - voltage) / voltage * 10000.0; // Calculate resistance
  Serial.print("LDR Resistance: ");
  Serial.println(resistance); // Print the resistance value to the serial monitor
  delay(1000); // Delay for 1 second before taking another reading
}
Upload the Code:
Upload the Arduino sketch to your Arduino board using the Arduino IDE.
Monitor the Output:
Open the Arduino IDE’s Serial Monitor (Tools -> Serial Monitor) to see the resistance values read from the LDR. You should see these values change as you expose the LDR to different light levels.
Calibration (optional):
You may need to calibrate your LDR readings based on your specific lighting conditions and the type of LDR you’re using. This typically involves measuring the LDR’s resistance in darkness and bright light and then scaling your readings accordingly.
With this setup, you can use the LDR to sense and respond to changes in light levels, which can be useful in various projects such as automatic lighting systems.
Experiment
Try and build a night light using an LED, if the ambient light drops below a certain level, the LED should automatically switch on.
Conclusion
The Light Dependent Resistor (LDR) is a versatile component that can be easily integrated with an Arduino to sense and respond to changes in light levels. By understanding how to wire and program an LDR, you can create projects that range from simple light sensors to more complex light-dependent control systems. Whether you’re building an automatic lighting system, a light-sensitive alarm, or any other project that involves monitoring light levels, the LDR and Arduino combination provides an accessible and effective solution for a wide range of applications in the world of electronics and automation.
Happy Tinkering!
Recommendations:
If you don’t already own any Arduino hardware, we highly recommend purchasing the Elegoo Super Starter Kit. This kit has everything you need to start programming with Arduino.
You can find out more about this kit here: Elegoo Super Starter Kit

