How to Build Your own Rubber Ducky with Arduino
In this Arduino Hacking Tools guide, we will learn how to create your own “Rubber Ducky” style tool with Arduino. Thanks to the great Duckduino project created by Seytonic and Spacehuhn we can have the power of a “Rubber Ducky” for a fraction of the cost.
What is the Rubber Ducky?
The USB Rubber Ducky is a product created and sold by Hak5, a company specializing in network penetration testing equipment. It’s a small USB device that appears to the host computer as a standard keyboard. When plugged into a computer, the USB Rubber Ducky can execute predefined keystrokes and scripts at a rapid pace, making it a powerful tool for automating tasks, running scripts, and potentially exploiting vulnerabilities.
The USB Rubber Ducky is commonly used by security professionals, ethical hackers, and penetration testers to assess the security of computer systems, test for vulnerabilities, and demonstrate the potential risks of unsecured systems.
It’s important to note that the USB Rubber Ducky, like many other security tools, can be used for both legitimate and malicious purposes, and its use should always be in compliance with legal and ethical standards.
About the Duckduino
The Duckduino is a project created by Seytonic and Spacehuhn back in 2017. It’s an Arduino based project that you can write your own predefined keystrokes to the code before uploading it to the Arduino board. The Duckduino project will only work with Arduinos that have the ATmega32U4 microprocessor chip.
Arduinos like the Pro Micro or Leonardo have the ATmega32U4 chip which allow them to be programmed for keystroke injection. Other Arduino’s like the Uno, Nano or Mega unfortunately cannot be used for this project as they have the ATmega328P chip which isn’t capable of keystroke injection.
Building the Duckduino
The process is fairly simple, just upload the code below to an Arduino board that is capable of keystroke injection.
You can find the project and code on GitHub here: https://github.com/Seytonic/malduino.
The Code
/*
Copyright (c) 2017 Seytonic, Spacehuhn (Licensed under MIT)
For more information see: github.com/seytonic/malduino
*/

#include "Keyboard.h"
#include "Mouse.h"

#define blinkInterval 50
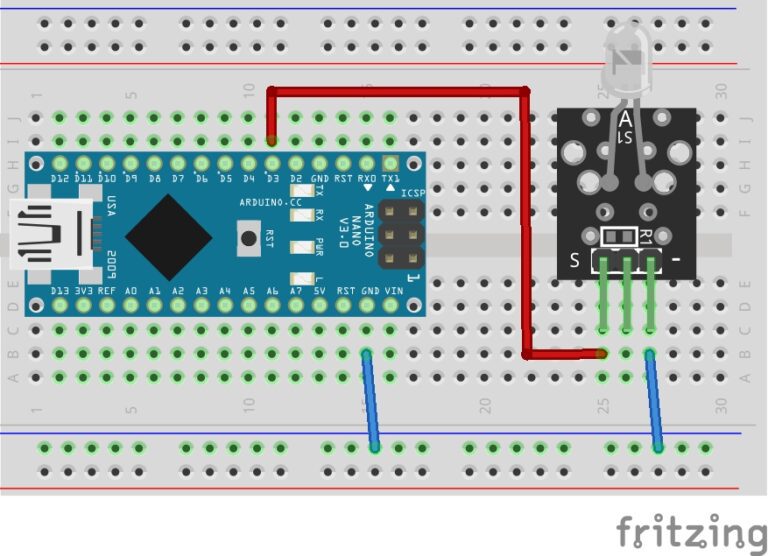
#define ledPin 3
#define buttonPin 6

int defaultDelay = 4;
int defaultCharDelay = 5;
bool ledOn = true;
int rMin = 0;
int rMax = 100;

void typeKey(int key){
  Keyboard.press(key);
  delay(defaultCharDelay);
  Keyboard.release(key);
}

void setup(){

  pinMode(buttonPin, INPUT_PULLUP);
  pinMode(ledPin, OUTPUT);

  digitalWrite(ledPin, HIGH);

  if(digitalRead(buttonPin) == LOW){

    Keyboard.begin();
    Mouse.begin();

    /* ----- Script-Begin (just a little Hello World example here) ----- */
    delay(1000);

    delay(defaultDelay);
    Keyboard.print("Hello World!");

    delay(defaultDelay);
    /* ----- Script-End ----- */
    Keyboard.end();
  }
}

void loop() {
  ledOn = !ledOn;
  digitalWrite(ledPin, ledOn);
  delay(blinkInterval);
}
You simply add your keystroke payload in between the Script-Begin and Script-End tags. Plug it into a target computer and the payload will execute. Creating more advanced payloads takes practice and working out the correct delays is paramount to a successful execution in my experience.
Conclusion
This Duckduino project is a fun one to play around with. It’s important to note that this can be used for malicious reasons, and you should always use such tools responsibly and ethically. Special thanks to Seytonic and Spacehuhn for creating another great project.
I would like to add, I have purchased the official Malduino from Maltronics and it is amazing. It uses an SD Card, which you can load with three separate payloads and switch between them. You find buy it here: Malduino. Seytonic also sells various other security testing tools, take a look around.
Arduino Recommendations:
The Elegoo Super Starter Kit
If you don’t already own any Arduino hardware, we highly recommend this kit as it has everything you need to start programming with Arduino. You can find out more about this kit, including a list of its components here: Elegoo Super Starter Kit
You can find this kit on Amazon here: Elegoo Super Starter Kit
The 0.96-inch Mini-OLED Display
We highly recommend this mini-OLED bundle of five 0.96-inch OLED displays. We have bought these before and they all worked perfectly. You can read more about the mini-OLED here: Mini-OLED
You can find this bundle on Amazon here: OLED Displays
Elegoo Nano (Arduino Compatible)
We have bought these Nano boards many times and can highly recommend them. There are three Nano boards in this pack making them a total bargain for everyone.
You can find this pack on Amazon here: Arduino Nano
ESP8266 D1-Mini
D1-Mini is an Arduino compatible Wi-Fi board based on an ESP-8266-12F. This WLAN board has 9 digital I/O pins.
You can find this board on Amazon here: D1-Mini


