

Introduction to the Arduino Library Manager
Now that you’ve written your first Arduino sketch, you might be wondering what’s next. As you continue building projects, you’ll often need your programs to do more, such as control a motor, read data from a sensor, or display information on a screen. Fortunately, there’s a simple way to make all of this easier: the Arduino Library Manager.
In short, libraries are collections of prewritten code that handle complex tasks for you. Rather than starting from scratch each time, you can use these libraries to save time and reduce errors. Even better, the Arduino Library Manager is built right into the IDE. It lets you search, install, and update libraries with just a few clicks.
In this guide, you’ll learn what libraries are, how they work, and how to manage them efficiently using the Library Manager.
Let’s get started!
What are Arduino Libraries?
To begin with, think of libraries as shortcuts for your code. They bundle together prewritten functions that solve common problems. As a result, you don’t need to write everything from scratch.
For example, the Servo library lets you control a motor with just a few lines of code. Instead of reinventing the wheel, you import the library and start working.
So, what makes libraries so useful?
First, they offer reusable code for frequent tasks like reading sensors, managing displays, or handling communication.
Next, the Arduino community actively creates and maintains thousands of libraries. Many are open source, so you can freely modify and reuse them.
Moreover, libraries often come with example sketches. These examples show you how to use the library correctly.
Finally, the Arduino IDE includes a built-in Library Manager. This powerful tool lets you find, install, update, or remove libraries without ever leaving the IDE. Therefore, you won’t need to search the web or manually unzip folders. Everything is just a few clicks away.
How to use the Arduino Library Manager
Now, here’s how to install and manage libraries:
Step 1. Open the Arduino IDE:
First, make sure the Arduino IDE is installed on your computer.
If not, follow this guide to install it before continuing.
Next, open the IDE by clicking the Arduino icon.
Step 2. Access the Arduino Library Manager:
Now, look at the top menu in the IDE.
Click on the Sketch menu.
Then, hover over Include Library.
Finally, choose Manage Libraries… from the submenu.

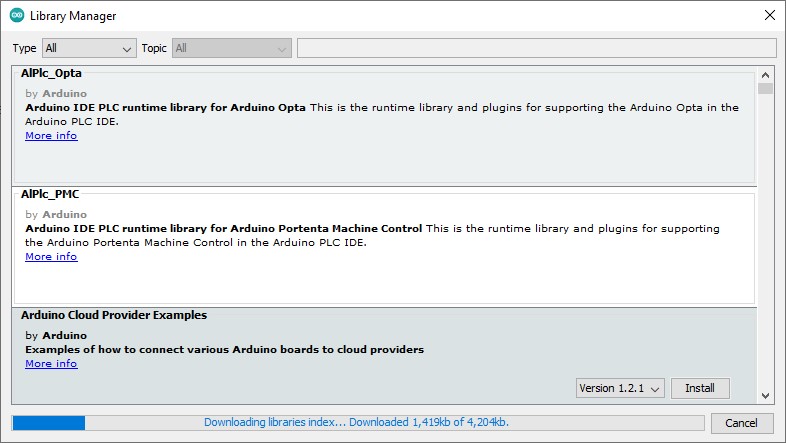
Step 3. Explore Available Libraries:
Inside the Library Manager, you’ll see a list of available libraries.
Each library includes a short description, version number, and installation status.
Additionally, you can use the search bar to find specific libraries by name.
Step 4. Install a Library:
To install a library:
First, search for the library you want.
Then, click the Install button next to its name.
Now, the IDE will download and install it automatically.
After that, the library is ready to use in your sketches.
Step 5. Remove or Update Libraries:
Sometimes, you’ll want to remove a library you no longer use.
To do that, simply click the Remove button beside its name.
Alternatively, if a newer version is available, you’ll see an Update button.
In that case, click Update to install the latest version.
Step 6. Using Installed Libraries:
Once installed, it’s easy to include a library in your sketch.
First, open the Sketch menu.
Then, select Include Library.
After that, click the library you want. The IDE will add an #include line at the top of your sketch automatically.
Step 7. Manual Installation:
Occasionally, you might find a library that isn’t available in the Library Manager.
In such cases, follow these steps:
First, download the .zip file from a trusted source (like GitHub).
Next, open the Arduino IDE.
Then, go to Sketch > Include Library > Add .ZIP Library.
Finally, select the .zip file. The IDE will install it for you.
Step 8. Update Library Dependencies (if needed):
Sometimes, a library requires other libraries to work correctly.
Therefore, always read the documentation.
If any dependencies are listed, install them using the Arduino Library Manager or manually as needed.
This helps avoid errors during compilation.
Step 9. Manage Your Own Libraries (if needed):
Eventually, you may want to create your own custom libraries.
To do this:
Place your custom library folder in the Arduino libraries directory.
Then, restart the IDE. It will detect and load your new library automatically.
Step 10. Keep Libraries Updated:
Lastly, make it a habit to check for updates in the Library Manager.
Updated libraries often include bug fixes, performance improvements, and new features.
By staying current, you’ll avoid compatibility issues and enjoy a smoother coding experience.
Troubleshooting & Common Questions
Where do libraries live?
When you install a library, it gets saved on your computer. By default, Arduino stores libraries in a folder called libraries inside your Arduino sketchbook folder. You can check or change this location in your IDE settings. Knowing where your libraries live helps if you ever want to back them up, delete them, or share them.
How to know if the library is working?
After installing a library, how do you know it works? To being, start by opening File > Examples in the Arduino IDE. Many libraries come with ready-to-run example code. Next, open an example sketch, upload it to your board, and see what happens. If it runs without errors, your library is working fine.
Library won’t install from the Arduino Library Manager
First, double-check your internet connection. Then, restart the Arduino IDE and try again. Still not working? The library may no longer be supported. In that case, download the ZIP file and install it manually.
Why can’t I see the library after installing it?
This usually happens when the IDE hasn’t refreshed. Close the Arduino IDE completely, then reopen it. After that, try adding the library again from the “Sketch” menu.
Sketch says “No such file or directory”
This error means the library isn’t being found. First, make sure it’s installed in the correct libraries folder. Next, check that the folder name matches the #include line exactly — spelling matters. Finally, verify that the .h file exists in the right location.
Manual install isn’t working
When installing a ZIP library manually, make sure you’re choosing the ZIP file itself. Also, avoid double folders. For example, avoid MyLibrary/MyLibrary/MyLibrary.h. The correct path should be MyLibrary/MyLibrary.h.
Can I install two versions of the same library?
No, the Arduino IDE only allows one version at a time. However, if you need to use different versions, install one manually and rename the folder.
Why does my library say ‘deprecated’?
A deprecated label means the library is outdated or no longer supported. Although it may still work, it’s safer to find an updated version or a replacement. Check the documentation or GitHub page for more info.
Library not working with my board
Not all libraries are compatible with every board. For instance, some libraries work with AVR-based boards but not with ESP32 or RP2040. Therefore, always check the “Compatible Boards” section in the Arduino Library Manager.
Can I Use Multiple Libraries in the Same Sketch?
Yes, you can include more than one library in a sketch. For example, you might use one library for a sensor and another for a display. Just make sure there are no conflicts. If two libraries use the same functions, your sketch might not compile. Test each library one at a time if you’re not sure.
Tips for Using The Arduino Library Manager
Keep these tips in mind as you work with libraries:
– Always check the README file. It tells you how to use the library.
– Don’t forget to restart the IDE after installing new libraries.
– Update libraries often. Bug fixes and new features matter.
Libraries may seem tricky at first. But with practice, they become your best tool for building cool projects fast.
Additionally, you can find more information here: Arduino Libraries
Conclusion
You’ve now mastered how to use the Arduino Library Manager, and that’s a major milestone in your learning journey. By using prewritten libraries, you’ve unlocked a faster and smarter way to build projects.
Instead of writing complex code from scratch, you can now rely on trusted tools from the Arduino community. These libraries do the heavy lifting for you.
As a result, your projects become easier to manage. They’re also more reliable and much more fun to create. Whether you’re lighting up LEDs or working with sensors, libraries save you time. They also reduce errors along the way.
But this is just the beginning.
In the next lesson, we’ll explore essential Arduino components like resistors, LEDs, sensors, and breadboards. Understanding these parts will give you a solid foundation to write meaningful code.
So, keep going! Every lesson builds your confidence. And every new concept brings you closer to building something incredible.
Finally, if you have any questions or want to share your projects? Connect with us on X/Twitter for more tips and inspiration!
Ready for more? click Next to continue learning.


