Raspberry Pi OS is the official operating system for the Raspberry Pi single-board computers. It was formerly known as Raspbian but was rebranded to Raspberry Pi OS to better reflect its focus on being the primary operating system for Raspberry Pi hardware. Raspberry Pi OS is a Linux-based operating system and is designed to be lightweight and optimized for the Raspberry Pi’s ARM architecture. In this guide we will take you step-by-step with the installation process for VirtualBox on Windows.
What is VirtualBox?
Oracle VM VirtualBox, commonly referred to as VirtualBox, is a powerful and free, open-source virtualization software that can be installed on Windows and allows you to create and run multiple virtual machines (VMs) on a single physical computer.
This guide assumes you have VirtualBox already installed on your Windows system. If you do not already have VirtualBox, you can download it here: VirtualBox
Why Choose Raspberry Pi OS?
Raspberry Pi OS is a great operating system for the Raspberry Pi, but it can also be installed it to your Windows system using VirtualBox.
Here are some key features of Raspberry Pi OS:
User-Friendly Interface: It provides a user-friendly desktop environment, making it suitable for people of all skill levels, including beginners.
Customization: Raspberry Pi OS can be customized and configured to suit various projects and needs.
Pre-installed Software: It comes with a range of pre-installed applications and tools, including a web browser, office suite, programming environments, and more.
Access to a Large Software Repository: Users can install additional software and packages from the extensive Raspberry Pi software repository.
Regular Updates: The Raspberry Pi Foundation actively maintains and updates the operating system to ensure it works optimally with the latest Raspberry Pi hardware.
Download Raspberry Pi OS
At the time of writing this post, the latest version of Raspberry Pi OS is Bullseye.
The download may take a while its 3.35GiB. Once download completes you can proceed.
Creating the Virtual Machine
Open VirtualBox and click New.
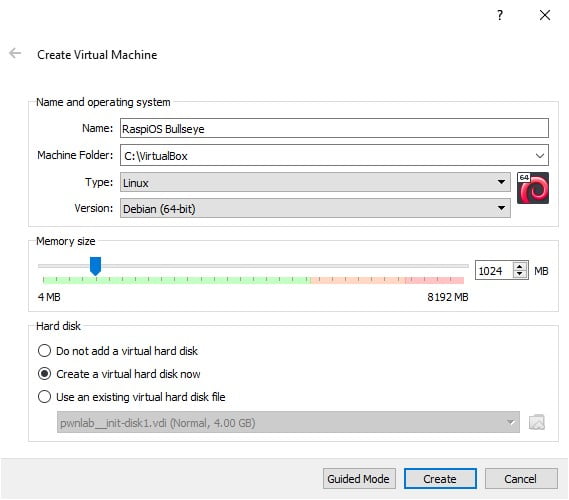
Name and operating system
Set name to: RaspiOS Bullseye.
Set Machine folder to wherever you store your Virtual machines, if this is your first Virtual machine, then choose a memorable location.
Set Type to: Linux.
Set Version to: Debian (64-bit).
Memory Size
Set the memory size how you want, just make sure it’s above 1024 and in the green.
Hard disk
Make sure the Hard disk is set to Create a virtual hard disk now then click Create.
Create Virtual Hard Disk
File size
The File size needs to be at least 25GiB. If you’re going to be doing work on your machine, then give it between 80-100GiB or more if you wish.
Hard disk file type
Set Hard disk file type to: VDI (VirtualBox Disk Image)
Storage on physical hard disk
Set Storage on physical hard disk to: Dynamically allocated. This way it won’t take storage space until it needs too.
Now click Create.
Preparing the new VM
Make sure RaspiOS is highlighted on the left then click on the settings tab.
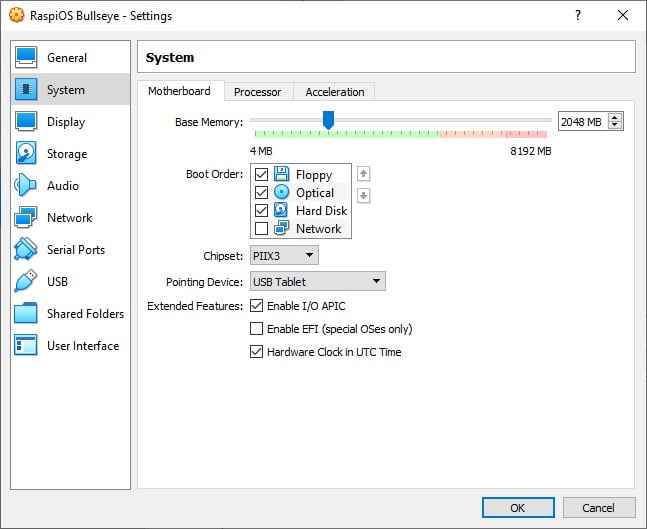
System Settings
Motherboard Settings
Go to System Settings > Motherboard. Give base memory a minimum of 1024MB, your system may have plenty spare so give as much as you want but 4096MB is more than enough.
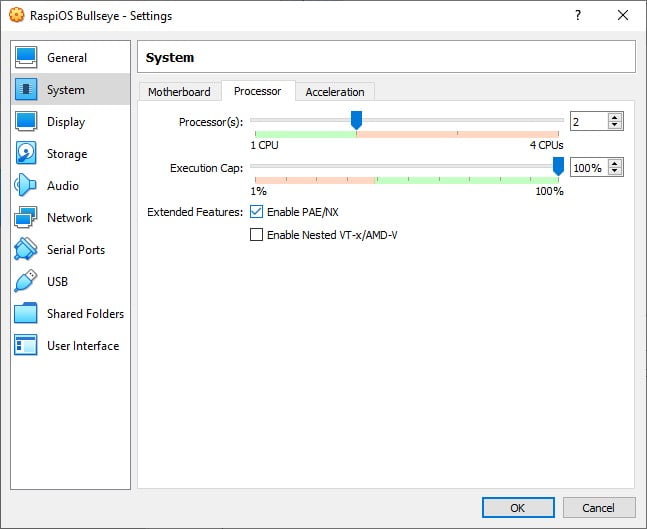
Processor Settings
Go to System Settings > Processor.
Here you can select how many processors you want to dedicate to Linux Mint. Depending on your system give it a minimum of 2 or more.
In the Extended Features:
Check the box for Enable PAE/NX.
PAE enables processors to access more than 4 GB of physical memory on capable versions of Windows and is a prerequisite for NX. NX allows the processor to help guard the PC from attacks by malicious software.
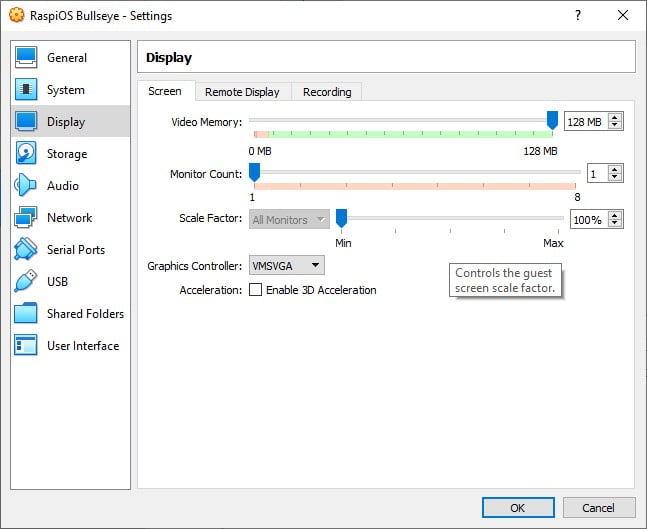
Display Settings
Go to Display Settings > Screen.
Set Video Memory to: 128MB.
Set Graphics Controller to: VMSVGA.
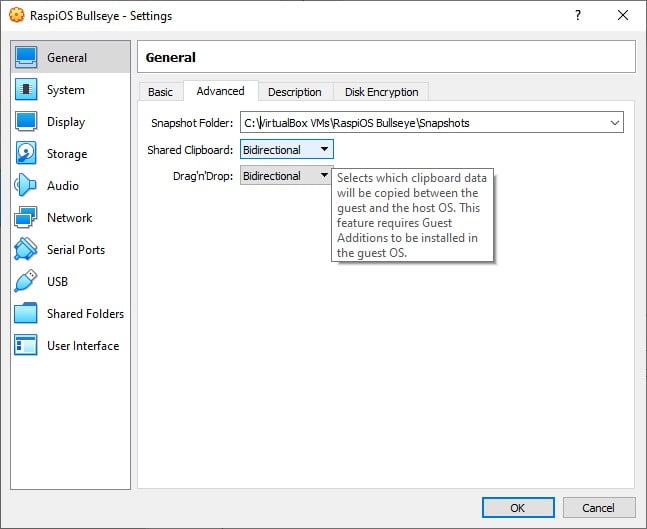
General Settings
This part is optional.
Go to General > Advanced.
Set Shared Clipboard to: Bidirectional.
Set Drag’n’Drop to: Bidirectional.
Storage Settings
Finally, we need to point the Virtual Machine to where the installer is located.
Go to Storage Settings and single click “Empty” below Controller: IDE to highlight it.
Now to the right, click on the disc under Attributes, select choose disk file, this will open a browser for you to locate and select the Raspberry Pi OS iso file you previously downloaded.
With the Installer in place, click OK.
Installation
Now you can press Start, to start the Raspberry Pi OS Virtual Machine and begin the installation process.
Select Graphical Install.
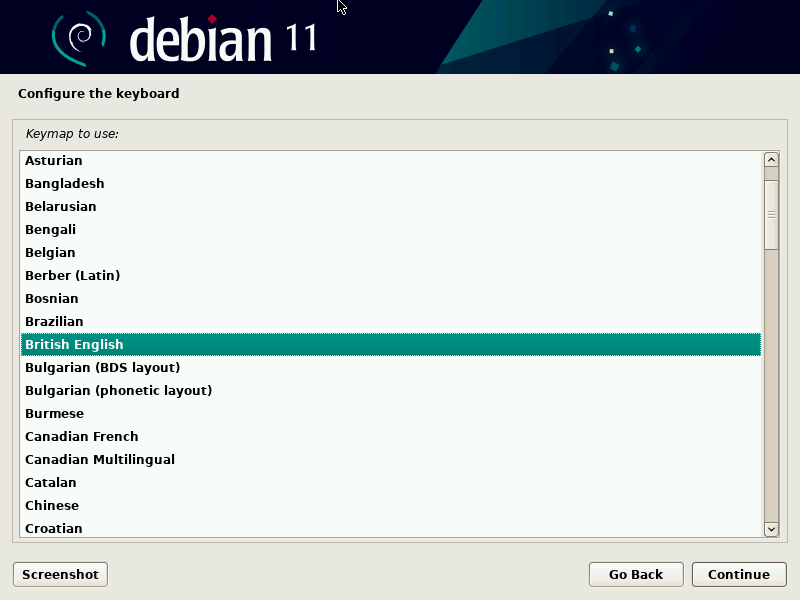
Keyboard Layout Settings
Choose your keyboard layout.
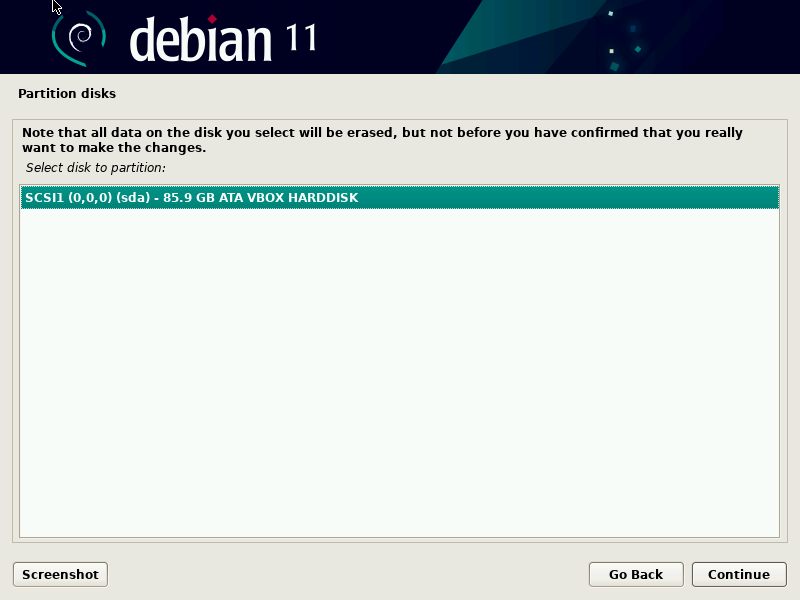
Partition Disks: Part-1
Select: Guided – use entire disk.
This will not affect your host system.
Click Continue.
Partition Disks: Part-2
Click Continue.
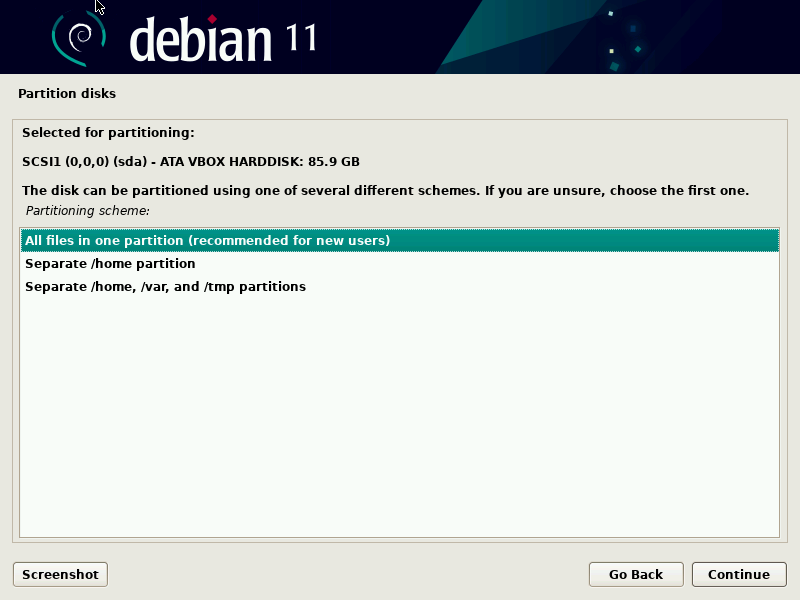
Partition Disks: Part-3
Select “All files in one partition”.
Partition Disks: Part-4
Select “Finish Partitioning and write changes to disk”.
Partition Disks: Part-5
Select Yes and click Continue.
Installation Begins
Select “Finish Partitioning and write changes to disk”.
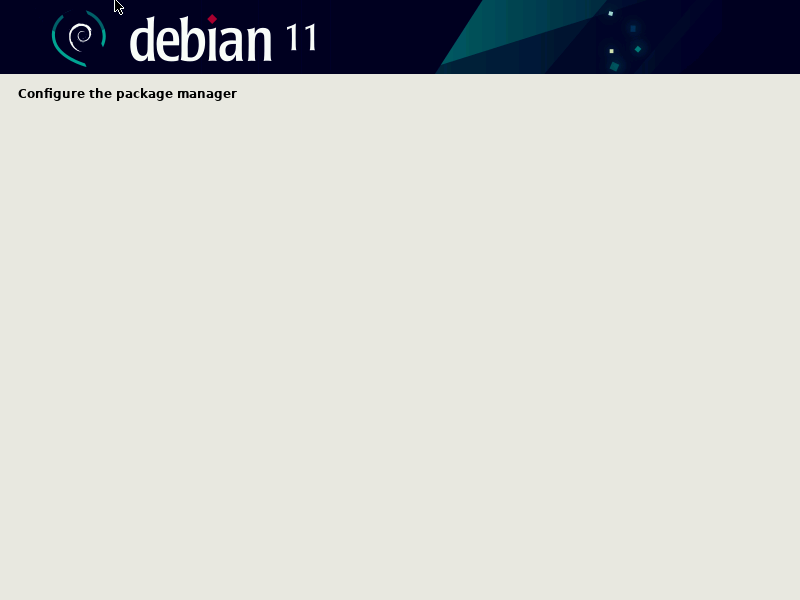
Configure the Package Manager
When my installation process reached this point, it hanged here for some time. If yours does the same, just leave it running and it will move on eventually.
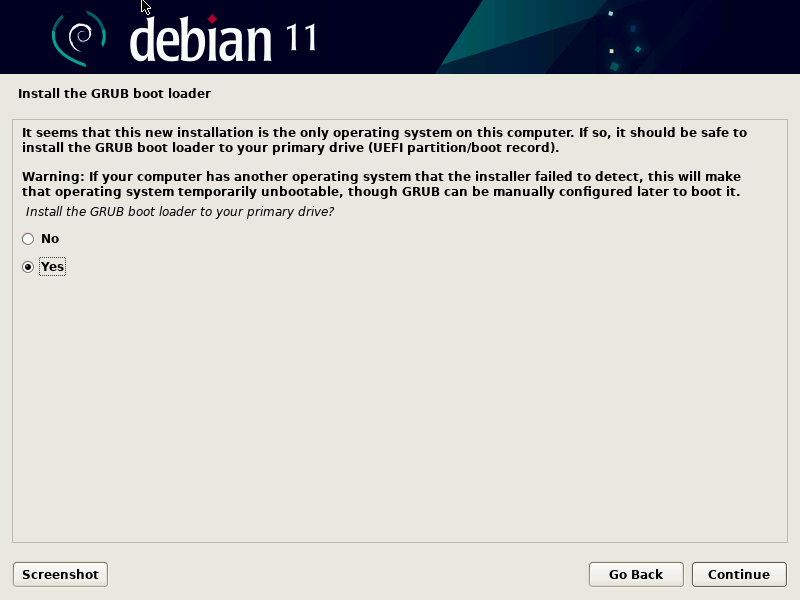
Install the GRUB Boot Loader: Part-1
Select Yes and click Continue.
This will not affect your host system.
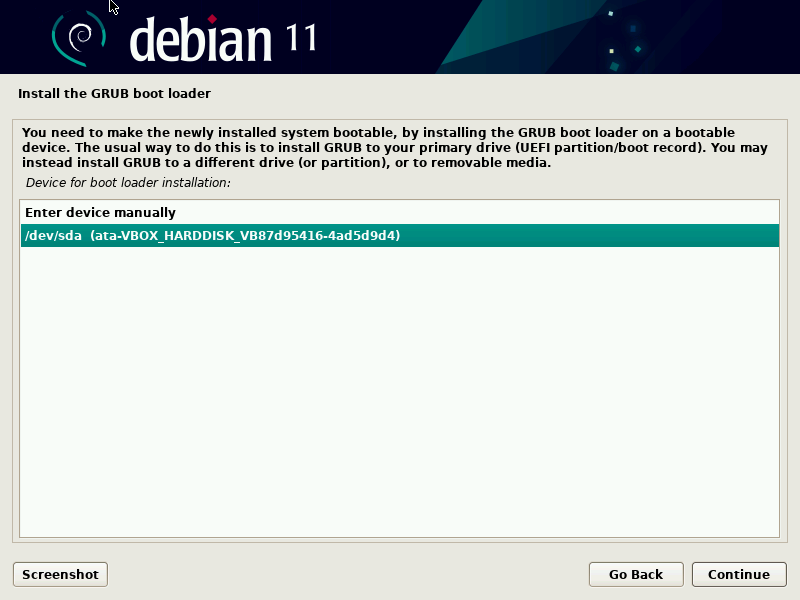
Install the GRUB Boot Loader: Part-2
Select the VBOX_HARDDISK and click Continue.
Finish the Installation
Click Continue to finish the install and reboot the Virtual machine.
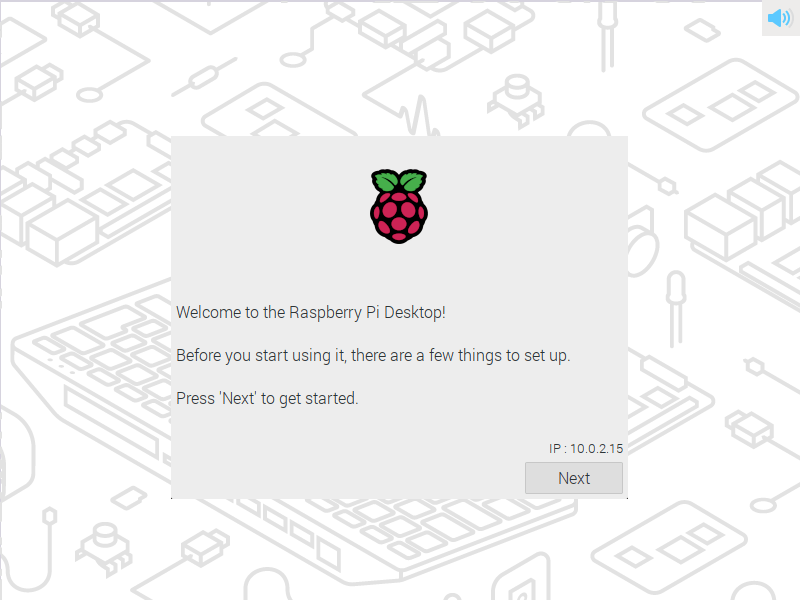
Raspberry Pi Welcome
Eventually you should see the Raspberry Pi welcome message.
Raspberry Pi Settings
Now we will have to run through some more settings before the process completes.
Click on Next to begin setup.
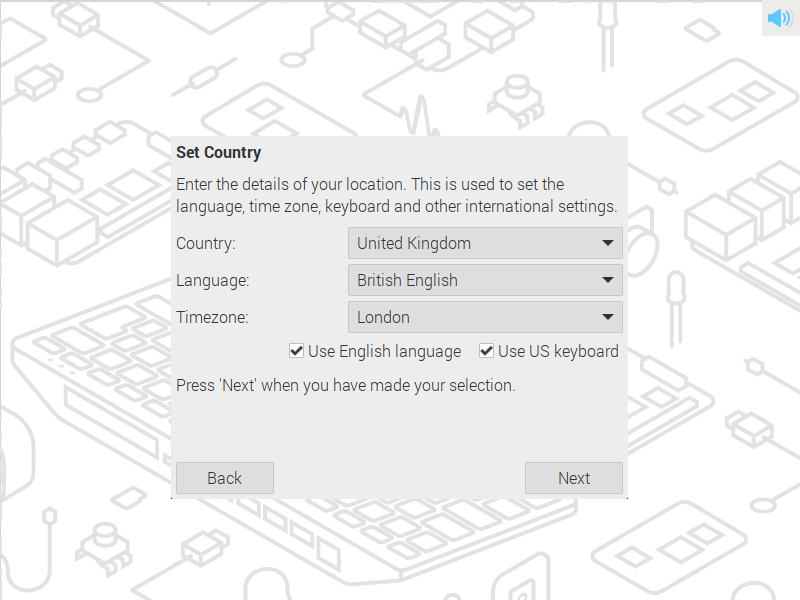
Set Country
Select your country.
Select your language.
Select your timezone.
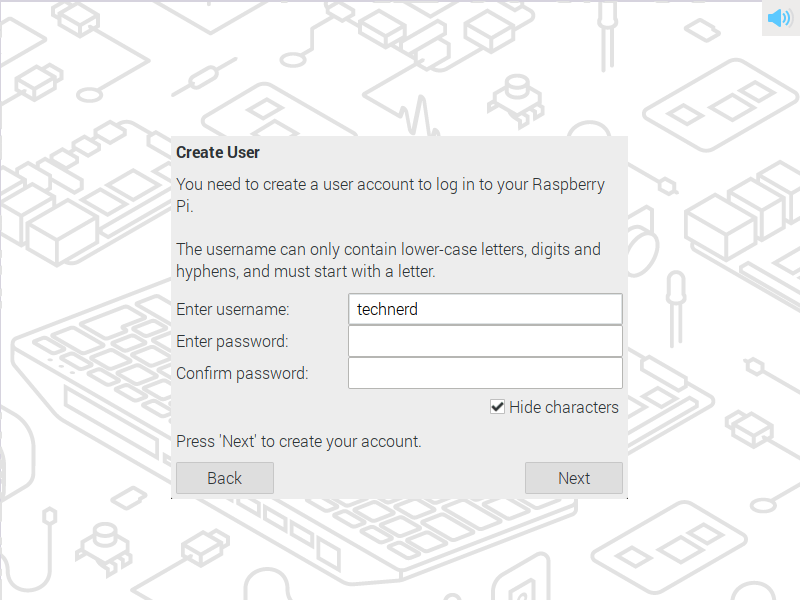
Create User
Enter a username.
Enter a password for this Virtual Machine.
Confirm the password.
Click on Next to move on.
Update Software
It’s a good idea to run the updater now, but you can skip this process if you wish to run updates at a later time.
As you can see in the image below, I have run the updates and now my system is up to date.
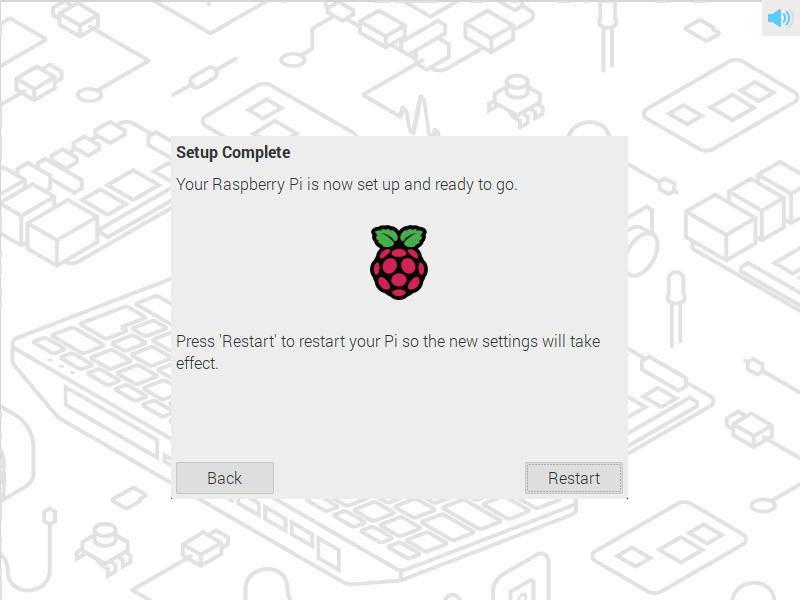
Setup Complete
That’s it the setup process is complete, and we are ready to boot into our new Raspberry Pi OS VM.
Click on Restart, to boot into the Raspberry Pi OS.
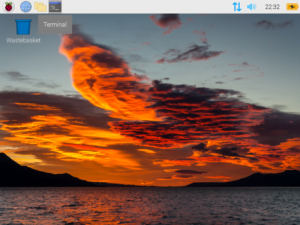
Raspberry Pi OS
Once booted you should now see a fresh copy of Raspberry Pi OS running on your Windows system.
Conclusion
Installing Raspberry Pi OS on VirtualBox opens up a world of possibilities for those who want to explore the Raspberry Pi ecosystem without needing physical hardware. By following this step-by-step guide, you’ve learned how to set up a virtual Raspberry Pi environment, giving you the flexibility to experiment, develop, and learn in a risk-free, virtual space. Whether you’re a novice looking to get started or an experienced Raspberry Pi enthusiast exploring new ideas, this method allows you to harness the power of Raspberry Pi OS on your computer.
If this is your first time using a Linux based system, why not take a look at our library of Linux Guides to help you get started: Linux Guides
Hey there! I’m Luke, a tech enthusiast simplifying Arduino, Python, Linux, and Ethical Hacking for beginners. With creds like CompTIA A+, Sec+, and CEH, I’m here to share my coding and tinkering adventures. Join me on Meganano for easy guides and a fun dive into tech, no genius required!


