


Exploring Motion Detection with OpenCV
In a world in constant motion, the ability to track and understand movement is a powerful asset. Enter the realm of motion detection with OpenCV, where computer vision transforms pixels into meaningful insights. This journey delves into the intricacies of motion detection algorithms, the science behind tracking dynamic changes, and the exciting possibilities it opens up. Join us as we explore the fascinating landscape of Motion Detection with OpenCV and unlock the potential for innovative applications that transcend industries.
What’s Covered:
- What is Motion Detection?
- The Process of Motion Detection.
- Explaining Background Subtraction.
- Explaining Element Structuring.
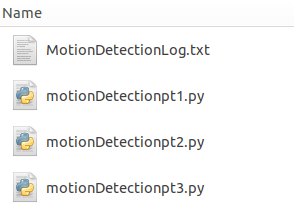
- Basic Motion Detection Program.
- Basic Motion Detection Resulting Images.
- Motion Detection with Event Logging.
- Event Logging Images.
- Motion Detection with Image Capture.
- My Nature Camera.
What is Motion Detection?
Motion detection is the ability to detect any changes of an objects position. Motion detection can be achieved various ways, one would be to use a passive infrared sensor which detects body heat and movement. We will of course be using computer vision to detect any motion.
The process of Motion Detection
The process is fairly straight forward:
- Capture a frame.
- Convert the frame to grayscale.
- Apply a background subtraction algorithm to detect when motion occurs.
- Use morphological operations to reduce background noise.
- Apply bounding boxes to the final frame to show where motion had occurred.
Explaining Background Subtraction
Background subtraction is a technique used for generating a foreground mask, which can then be used against the background model to detect the motion of the foreground mask. The background model is created in two steps: Background initialization & Background Update. The first step captures and processes the data. In the second step, the model is updated with a new frame so it can adapt to any changes that occurred.
Explaining Element Structuring
OpenCV has a function for returning a structuring element of a specific shape and size for morphological operations. The function will construct and then return the structuring element which can then be used to erode, dilate, and/or MorphologyEX. MorphologyEX is the image or frame we want to apply the morphological operations to.
Basic Motion Detection Program
As I previously mentioned, the basic code we will be starting with is less than 30 lines of code. I will however be expanding the code with even more functionality in the next stage.
Python Code:
import cv2

camera=cv2.VideoCapture(0)

mog = cv2.createBackgroundSubtractorMOG2()

while True:
  ret,frame = camera.read()

  gray = cv2.cvtColor(frame, cv2.COLOR_BGR2GRAY)

  fgmask=mog.apply(gray)

  structure=cv2.getStructuringElement(cv2.MORPH_ELLIPSE,(5,5))
  fgmask=cv2.erode(fgmask, structure, iterations=1)
  fgmask=cv2.dilate(fgmask, structure, iterations=1)

  cnts, hierarchy = cv2.findContours(fgmask, cv2.RETR_EXTERNAL, cv2.CHAIN_APPROX_SIMPLE)

  for c in cnts:
    if cv2.contourArea(c)<1000:
      continue

    (x,y,w,h) = cv2.boundingRect(c)
    cv2.rectangle(frame, (x,y),(x+w,y+h),(0,255,0),2)

  cv2.imshow('FG Mask', fgmask)
  cv2.imshow('Motion Detection', frame)

  if cv2.waitKey(1)==ord('q'):
    break

camera.release()
cv2.destroyAllWindows()
Resulting Images
Below are some screen shots I took during the process.
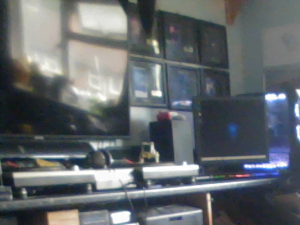
The Background
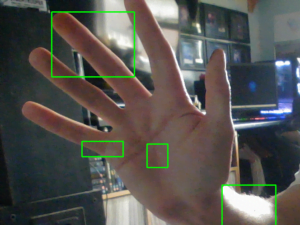
Motion Detected
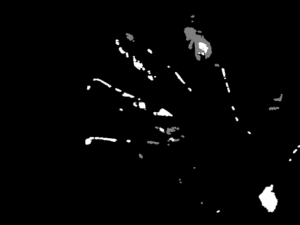
The Foreground Mask
Motion Detection with Event Logging
Using basic Python, we can create a log file to log the time and date of when any event when motion is detected. This can be useful if you need to know what time an event occurred while you were away from the system.
Python Code:
import cv2
import datetime
import time
import sys
import os

camera=cv2.VideoCapture(0)
mog = cv2.createBackgroundSubtractorMOG2()

logFile='/home/meganano/Desktop/Python-AI/Day5A/MotionDetectionLog.txt'
WRITE='w'
APPEND='a'

currentTime=datetime.datetime.now()
file=open(logFile, mode=APPEND)
file.write('Motion Detection Log\n')
file.write('System Reboot @ ')
file.write('Time:'+str(currentTime)+'\n')
file.close()

newTime=0

while True:
  ret,frame = camera.read()

  gray = cv2.cvtColor(frame, cv2.COLOR_BGR2GRAY)
  fgmask=mog.apply(gray)

  structure=cv2.getStructuringElement(cv2.MORPH_ELLIPSE,(5,5))
  fgmask=cv2.erode(fgmask, structure, iterations=1)
  fgmask=cv2.dilate(fgmask, structure, iterations=1)

  cnts, hierarchy = cv2.findContours(fgmask, cv2.RETR_EXTERNAL, cv2.CHAIN_APPROX_SIMPLE)

  for c in cnts:
    if cv2.contourArea(c)<1000:
      log='no'
      continue

    (x,y,w,h) = cv2.boundingRect(c)
    cv2.rectangle(frame, (x,y),(x+w,y+h),(0,255,0),2)
    log='yes'

  if log=='yes':
    try:
      timeNow = time.time()
      stringTime = datetime.datetime.fromtimestamp(timeNow).strftime("%Y.%m.%d_%H.%M.%S")

      if newTime != stringTime:
        currentTime=datetime.datetime.now()
        file=open(logFile, mode=APPEND)
        file.write('@'+str(currentTime)+' Motion Detected\n')
        file.close()
        print('Motion Logged @ '+str(currentTime))
        newTime = stringTime

    except:
      print('Logging Error Occurred')

    cv2.imshow('FG Mask', fgmask)
    cv2.imshow('Motion Detection', frame)

    if cv2.waitKey(1)==ord('q'):
      break

camera.release()
cv2.destroyAllWindows()
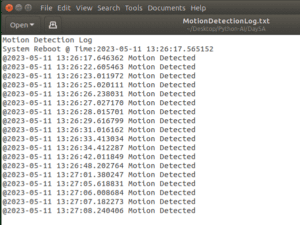
Motion Detection with Event Logging Images
Below are some screen shots I took during the motion detection process.
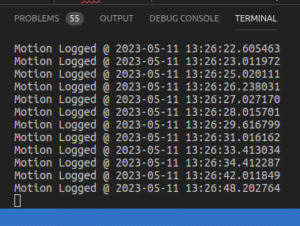
Motion Logged to Console
Motion Detection Log File is Created
Content Stored in Log
Motion Detection with Image Capture
Having a log for every detection event is great, but we can also save the frame that was captured when a motion event had occurred by adding just 2 more lines to our code. The first is to save the Image with the detection areas highlighted with the bounding boxes. The second line is not necessary and can be removed or commented out if you wish, I just wanted to show the foreground mask as well.
Python Code:
import cv2
import datetime
import time
import sys
import os

camera=cv2.VideoCapture(0)
mog=cv2.createBackgroundSubtractorMOG2()

logFile='/home/meganano/Desktop/Python-AI/Day5A/MotionDetectionLog.txt'
WRITE='w'
APPEND='a'

timeNow = time.time()
stringTime = datetime.datetime.fromtimestamp(timeNow).strftime("%d/%m/%y@%H.%M.%S")

file=open(logFile, mode=APPEND)
file.write('Motion Detection Log\n')
file.write('System started @ ')
file.write(stringTime+'\n')
file.close()

newTime=0

while True:
  ret,frame = camera.read()

  gray = cv2.cvtColor(frame, cv2.COLOR_BGR2GRAY)
  fgmask=mog.apply(gray)

  structure=cv2.getStructuringElement(cv2.MORPH_ELLIPSE,(5,5))
  fgmask=cv2.erode(fgmask, structure, iterations=1)
  fgmask=cv2.dilate(fgmask, structure, iterations=1)

  cnts, hierarchy = cv2.findContours(fgmask, cv2.RETR_EXTERNAL, cv2.CHAIN_APPROX_SIMPLE)

  for c in cnts:
    if cv2.contourArea(c)<1000:
      log='no'
      continue

    (x,y,w,h) = cv2.boundingRect(c)
    cv2.rectangle(frame, (x,y),(x+w,y+h),(0,255,0),2)
    log='yes'

  if log=='yes':
    try:
      timeNow = time.time()
      stringTime = datetime.datetime.fromtimestamp(timeNow).strftime("%d/%m/%y @ %H.%M.%S")

      if newTime != stringTime:
        onlyTime=datetime.datetime.now().strftime("%H-%M-%S %p")
        print(stringTime)
        print(onlyTime)
        cv2.imwrite('/home/meganano/Desktop/Python-AI/Day5A/' + str(onlyTime) + '.jpg',frame)
        cv2.imwrite('/home/meganano/Desktop/Python-AI/Day5A/' + str(onlyTime) + '.(Mask).jpg',fgmask)
        file=open(logFile, mode=APPEND)
        file.write('Motion Detected on '+stringTime)
        file.write('\n')
        file.close()
        print('Motion Logged @'+stringTime)
        newTime = stringTime

    except:
      print('Logging Error Occurred')

  cv2.imshow('FG Mask', fgmask)
  cv2.imshow('Motion Detection', frame)

  if cv2.waitKey(1)==ord('q'):
    break

camera.release()
cv2.destroyAllWindows()
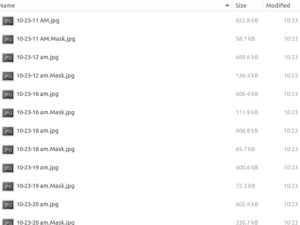
Motion Detection with Image Capture Saved Images
Below is a screen shot of the images captured during a detection event.
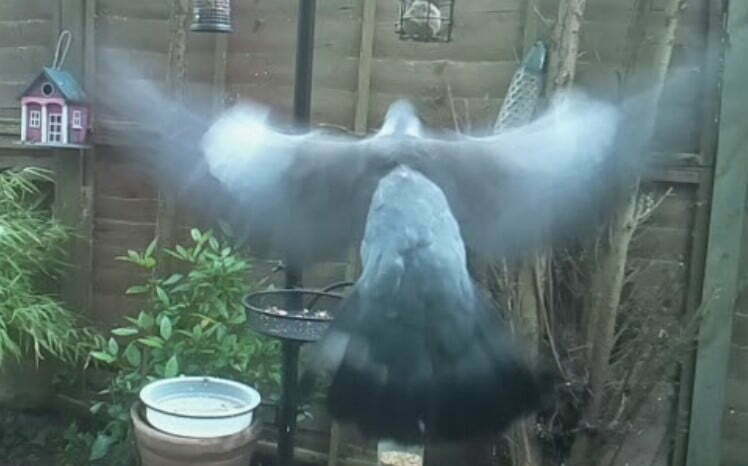
My Nature Camera
Motion detection can be really useful for many purposes, I personally use motion detection for security and monitoring wildlife. I capture images of birds at the feeding table and hedgehogs roaming around at night. I also have a camera pointed to my doorstep for when parcels are just left there.
Below are two great images my cameras managed to capture in the garden.

Conclusion
As we conclude our exploration of Motion Detection with OpenCV, it’s clear that the ability to analyze movement through computer vision has vast implications. From surveillance systems to interactive installations, the applications are diverse and promising. The world is in perpetual motion, and OpenCV empowers us to not only observe but also understand and respond to these dynamic changes. As you embark on your own ventures in motion detection, remember that every pixel tells a story, and with OpenCV, you have the power to decipher it. Keep innovating and stay curious in the evolving landscape of computer vision.
In the next installment of our OpenCV for Beginners guide we will be learning more about RGB Colors
That’s All Folks!
You can find all of our OpenCV guides here: OpenCV for Beginners

