

What Are Common Electronic Components?
Firstly, when working with Arduino, you’ll use many common electronic components. These are the hardware that bring your projects to life. For example, you might add an LED to show a signal. Or you might use a sensor to detect motion or temperature. These pieces are simple, but powerful. Together, common electronic components help you build real, working projects. From basic circuits to smart gadgets, they all start with the same essential parts.
Recommendations:
First, if you don’t have any Arduino hardware, don’t worry. There’s an easy solution. We highly recommend starting with the
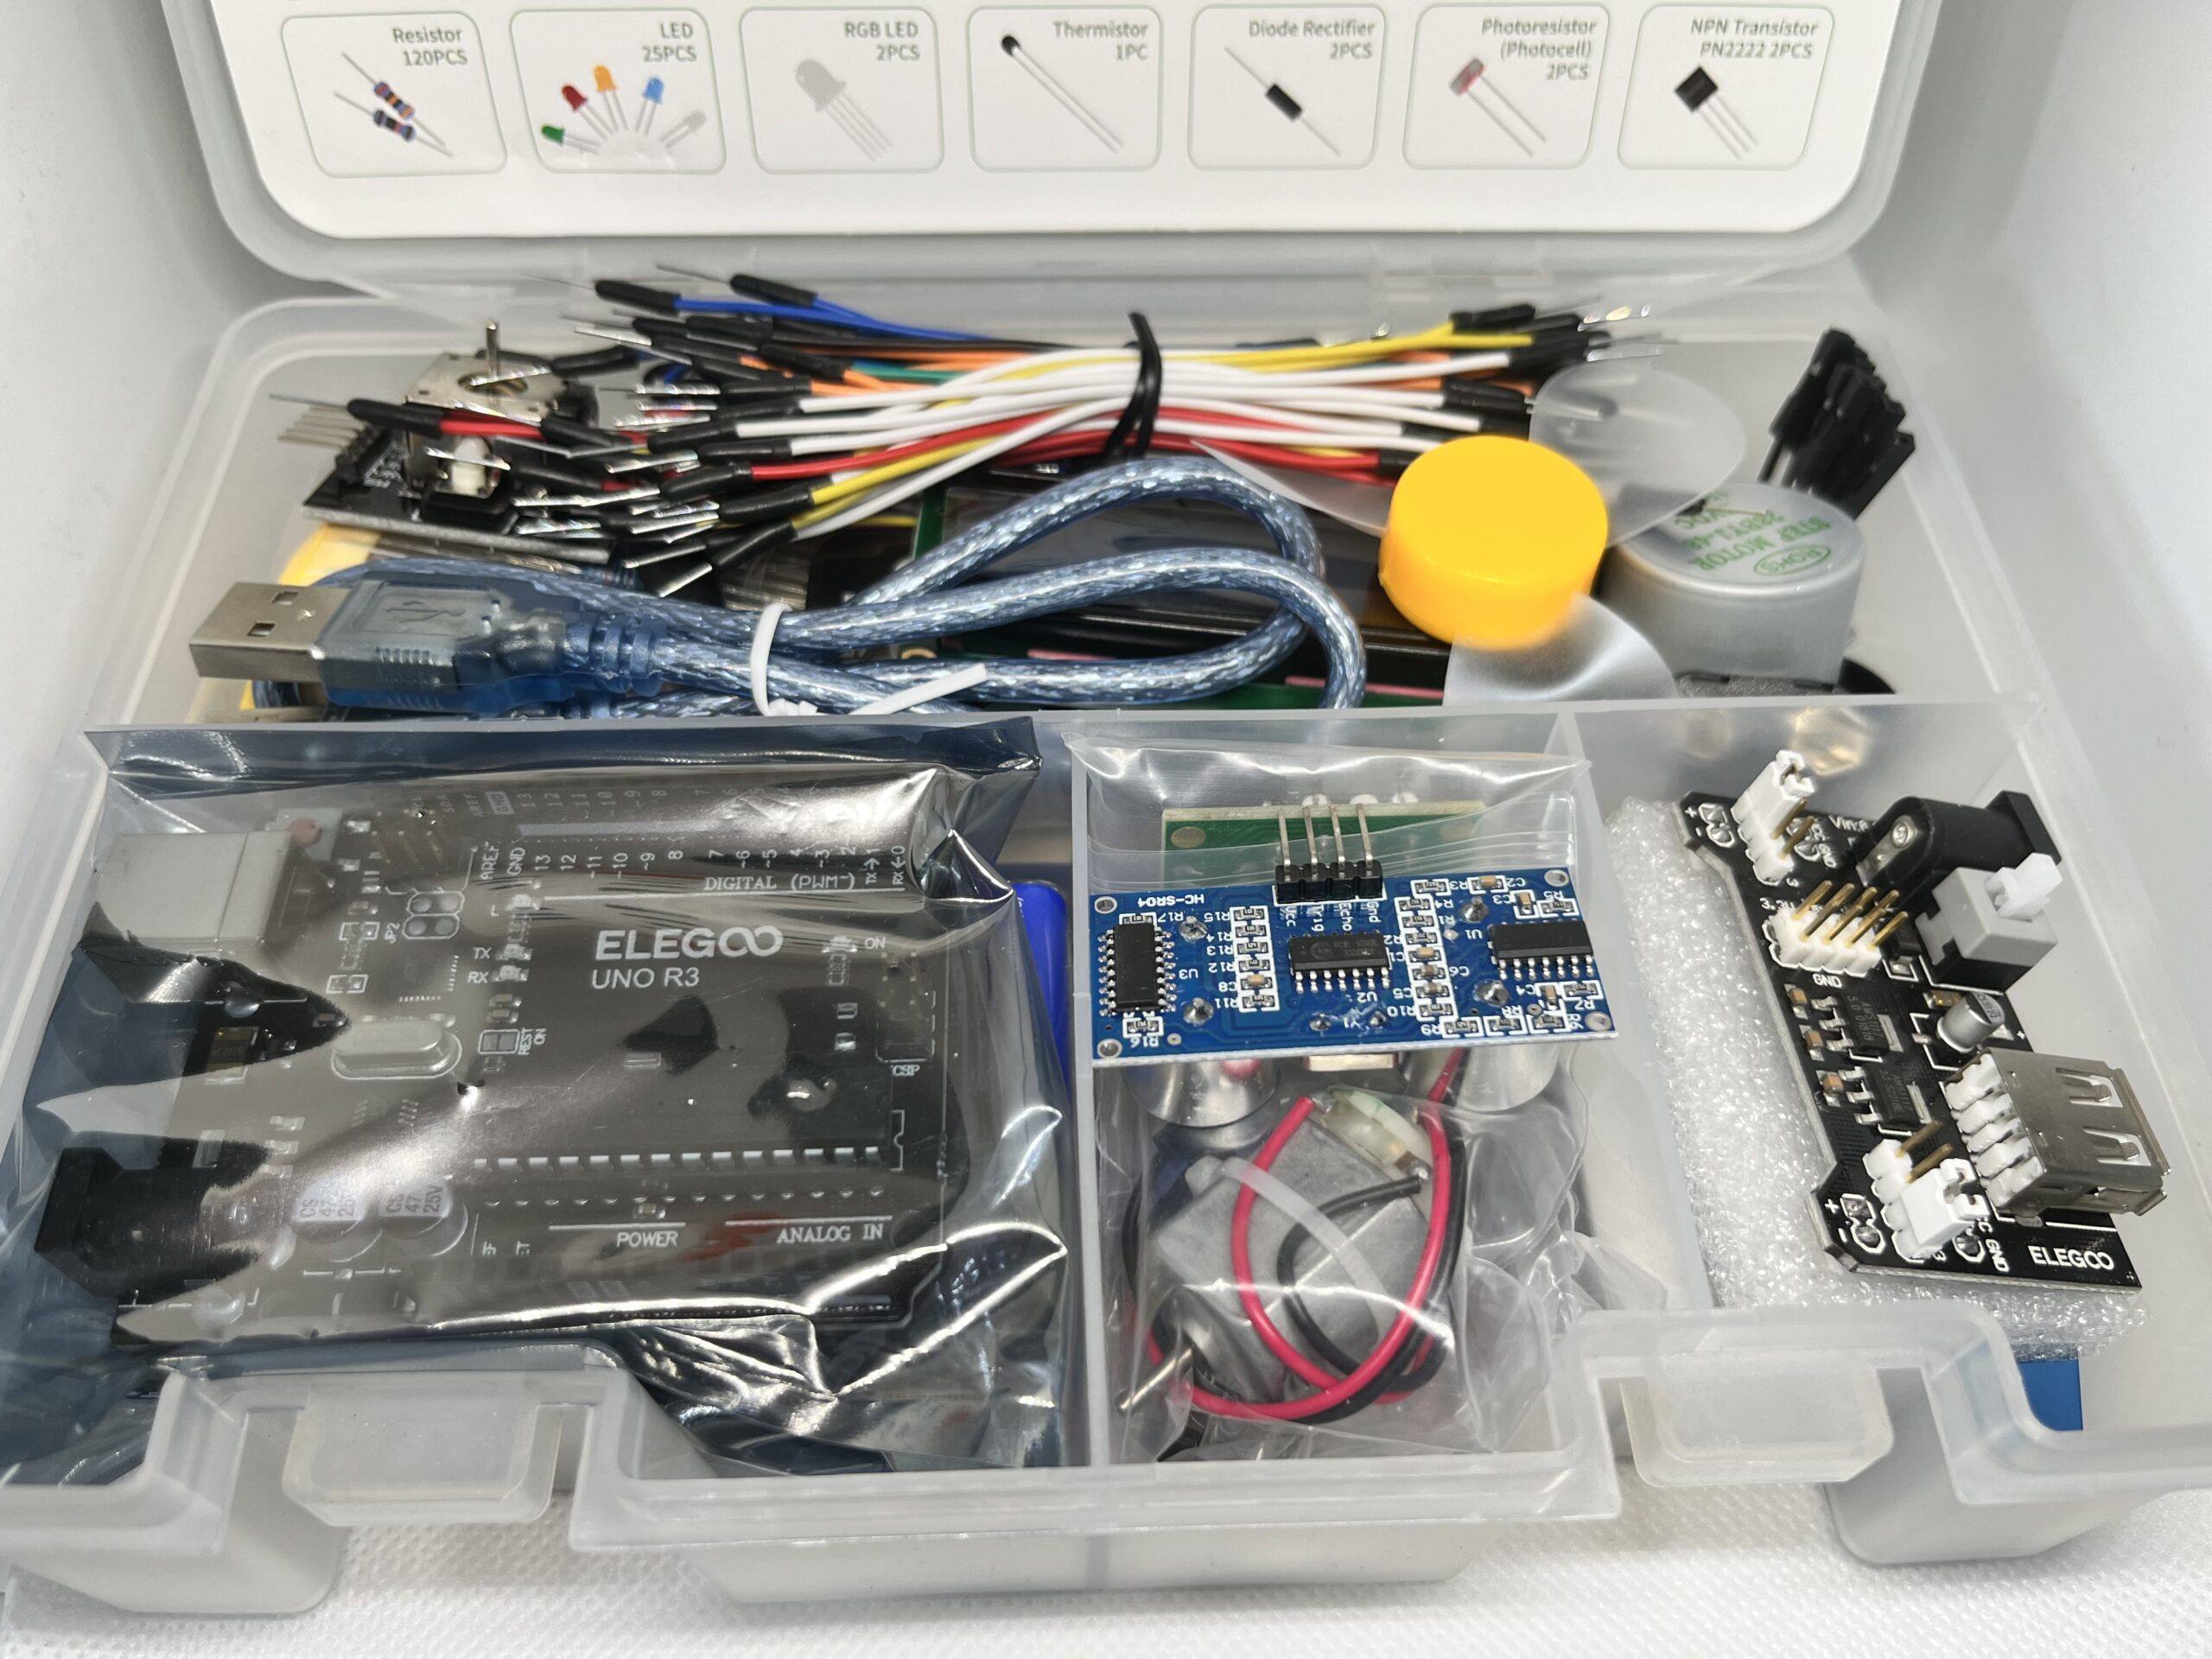
Elegoo Super Starter Kit It’s ideal for beginners.
Why? Because it includes all the essentials, Arduino UNO, LEDs, resistors, sensors, and more.
Want to learn more? Elegoo Super Starter Kit
Why Common Electronic Components Matter
Every Arduino project connects code with the real world. That’s where common electronic components come in. For example, they allow your Arduino to sense, respond, and interact with its surroundings. In short, they make your projects come alive. Thanks to their versatility, these parts are perfect for beginners and advanced makers alike.
So, as you can see, Arduino components come in all shapes and sizes. Each with a unique purpose. Consequently, understanding what each component does will make it much easier to plan your circuits, write better code, and troubleshoot problems as they arise.
Now, before we start wiring things up, take a moment to explore these essential tools. Furthermore, once you’re familiar with them, you’ll be able to build smarter and faster as we continue our Arduino Bootcamp.
Common Electronic Components (And What They Do)
Now, when it comes to Arduino projects, common electronic components are everything. For instance, these tiny parts connect your code to the physical world, blinking lights, moving parts, sensor inputs, and more. Additionally, to help you get familiar, we’ve grouped the most common electronic components into categories based on what they do and how they’re used.
Indicators and Output Devices
We’ll start with the components you’ll use to show what’s happening in your circuit. LEDs are simple but powerful, they light up to signal activity or provide feedback. You’ll often pair them with resistors, which prevent too much current from damaging your LED. Need to display text or numbers? LCD and OLED displays can show sensor readings, messages, or anything your code sends their way. For audio feedback, buzzers and speakers let your projects make sounds or play tones.
Motion, Control, Input and Sensor Components
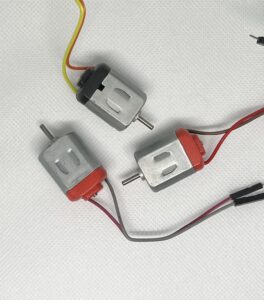
Now, if you want your Arduino to move things, you’ll be using motors. DC motors provide basic spinning motion, perfect for fans or wheels. Servo motors, on the other hand, offer precise control over angle and position, great for robotic arms or steering. Behind the scenes, motor drivers act as intermediaries, safely controlling motor speed and direction. And when you need to switch on larger devices like lamps or appliances, relays allow your Arduino to handle high-power loads.
For your Arduino to react to its environment, you’ll need sensors. These range from temperature and humidity sensors to motion detectors, light sensors, and more. They send real-world data to your board, allowing your code to respond in real time. Buttons and tactile switches also count as input; they let users trigger actions manually. Need variable input? A potentiometer lets you control things like brightness or volume with a simple twist.
Communication, Timing, Power and Circuitry Essentials
Sometimes, you want your project to connect with the outside world. IR modules allow for remote control functionality, while Bluetooth and Wi-Fi modules unlock wireless communication with smartphones, computers, or the cloud. To keep your projects aware of time, RTC (Real-Time Clock) modules maintain the current time even when your Arduino is turned off.
Finally, no circuit is complete without solid power management. Voltage regulators ensure that each component receives a safe, consistent voltage. Meanwhile, capacitors store and release energy when needed, and diodes control the direction of current flow. Transistors also play a vital role—they amplify signals or act as electronic switches. In addition, breadboards give you a convenient space to prototype and test circuits without any soldering, making it easy to experiment and iterate.
Understanding the Breadboard
To begin, before you start wiring components together, you’ll need a tool that makes building circuits quick and easy. For example, that’s where the breadboard comes in. In fact, it’s one of the most important tools in Arduino prototyping.
A breadboard lets you build circuits without any soldering. That means you can change your setup whenever you need to. It’s perfect for beginners, students, and anyone testing ideas on the fly.
So, how does it work?
First, take a look at the rows and columns. Inside the breadboard, each row or column is internally connected. When you insert a component’s leg into a hole, it becomes connected to the others in that group.
On the sides, you’ll notice power rails—long rows labeled with plus and minus signs. The + rail usually carries your positive voltage (like 5V), and the – rail is for ground (GND). These help you power all your components from one source.
To use a breadboard, simply insert resistors, LEDs, sensors, and jumper wires into the holes. If they’re in the same row or column, they’re electrically connected. This makes it easy to link parts together without needing to twist wires or use tools.
Most importantly, since there’s no soldering, you can adjust your design as often as needed. If something doesn’t work, just pull it out and try again.
Thanks to the breadboard, prototyping becomes fast, flexible, and beginner friendly. That’s exactly why it’s used in nearly every Arduino learning project.
Creating Our First Circuit
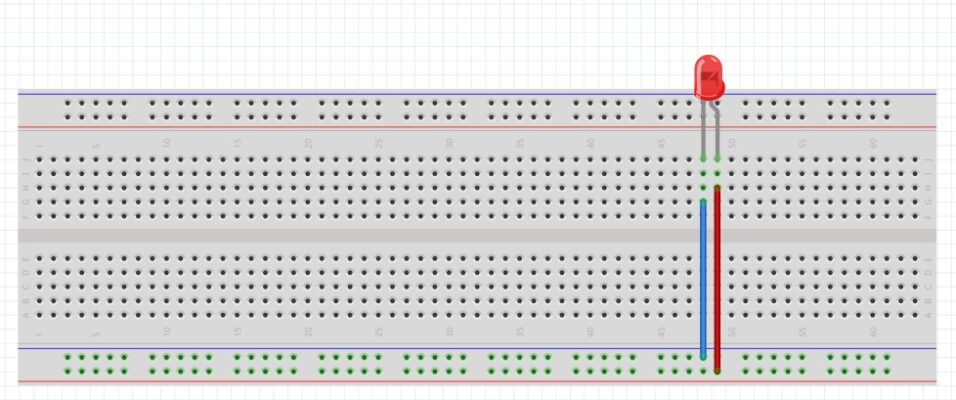
Next, we are going to make a basic circuit using two components. An LED and a 220 Ohm Resistor.
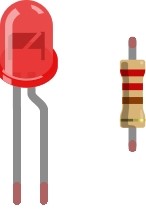
Firstly, an LED has two legs: one long and one short.
For example, the long leg is the anode, which connects to the positive (+) side of your circuit. Meanwhile, the short leg is the cathode, and it connects to the negative (–) side.
Finally, always double-check the orientation. If you connect the LED in reverse, it may not light up, or worse, it could get damaged.
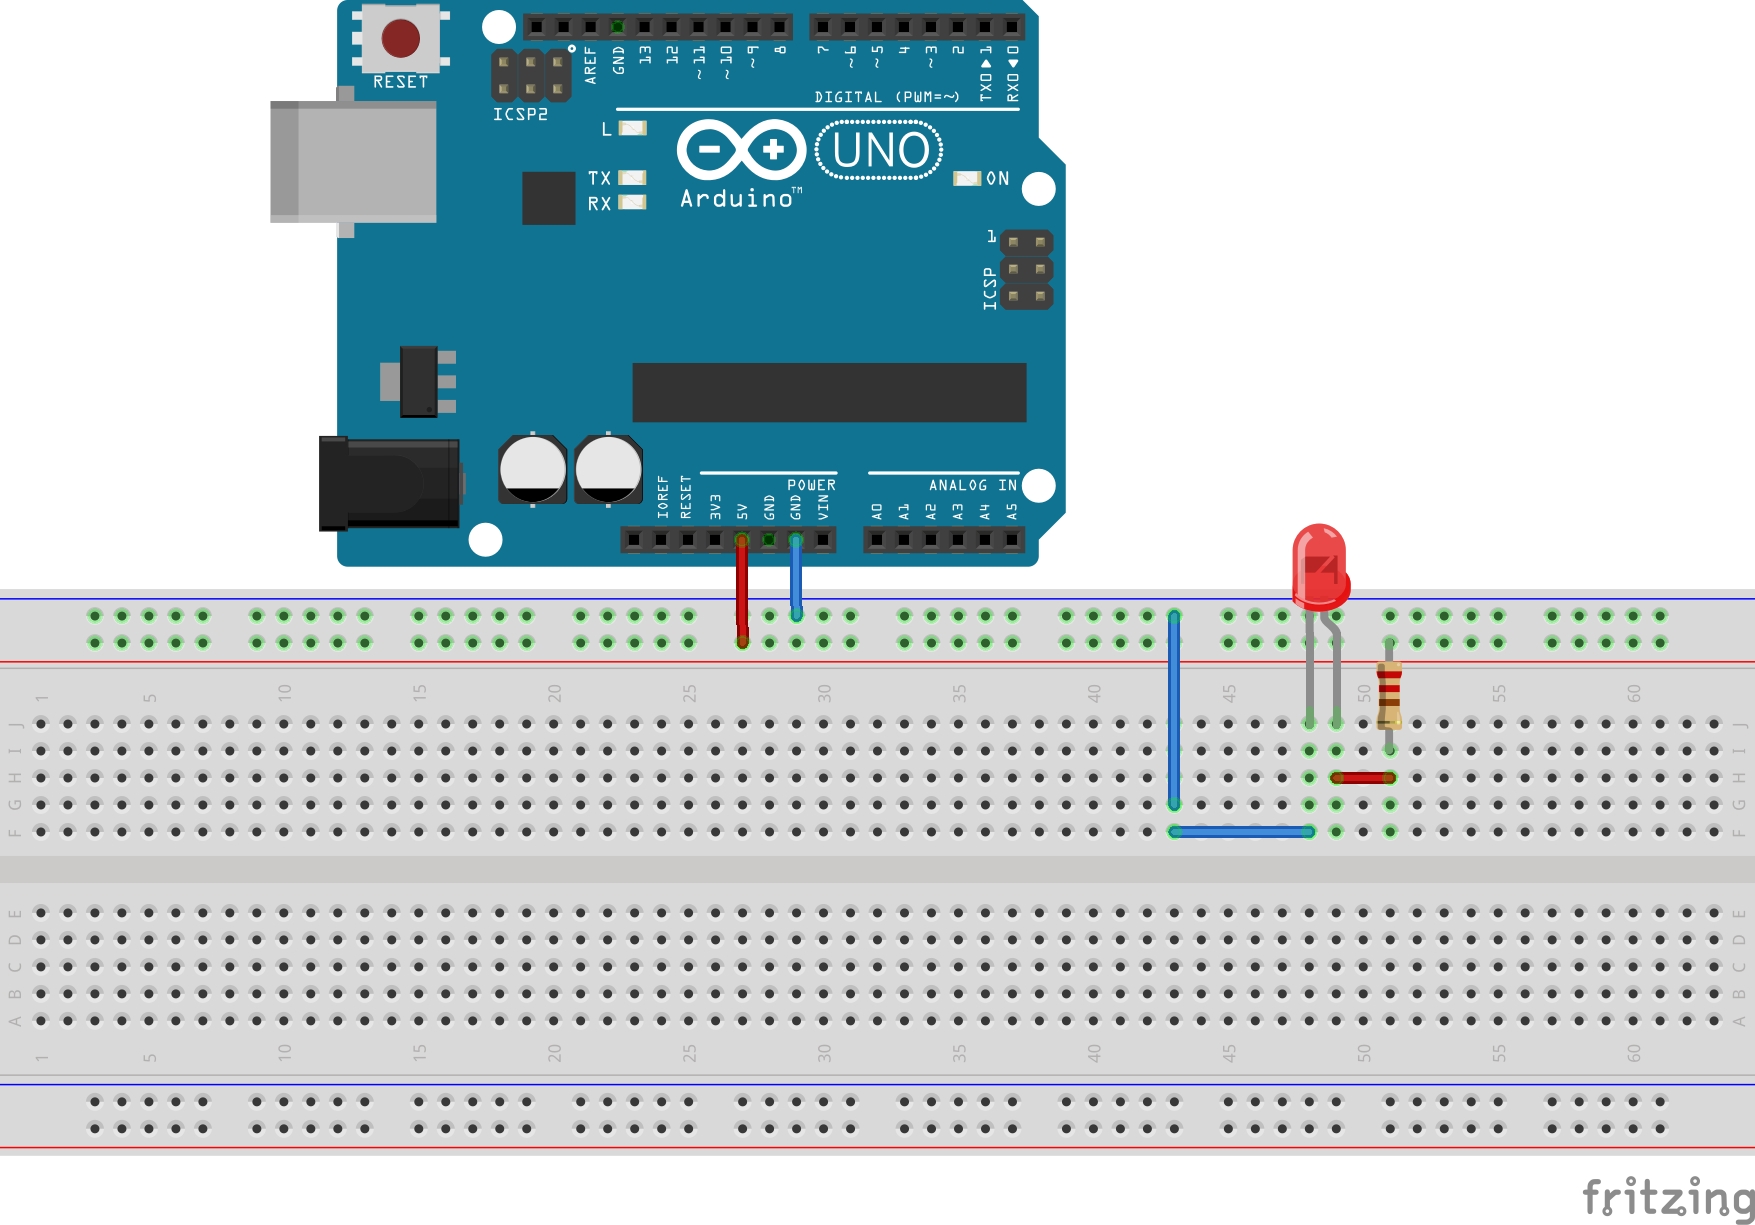
To begin, start by inserting a 220-ohm resistor into the red power rail on the breadboard. Place the other leg into the nearest available vertical column in the center section.
Next, insert your LED into the breadboard. Connect the anode to the resistor using a jumper wire. Then, connect the cathode to the breadboards blue rail.
Now, use a jumper wire to connect 5V from the Arduino to the red power rail. Then use another jumper wire to connect GND from the Arduino to the blue ground rail.
Lastly, once everything is connected, plug the USB cable into your Arduino, and connect the other end to your computer.
You should now see your LED light up!
Most importantly, without the resistor you could have permanently damaged the LED. Resistors limit the current, which protects your components and keeps everything running safely.
Conclusion
To begin with, you’ve explored some of the most common electronic components used in Arduino projects. From resistors and LEDs to sensors, motors, and more, each part plays a key role in how your circuits behave and respond.
Next, you discovered how these components work together, especially when creating your very first circuit. By wiring an LED with a resistor and powering it through the Arduino, you took your first hands-on step into physical computing.
More importantly, you now understand the value of planning, positioning, and connecting components the right way. As you move forward, this foundation will help you build smarter and troubleshoot faster.
In the coming lessons, you’ll not only connect more complex components, but you’ll also control them with code. Eventually, you’ll be able to combine everything you’ve learned into exciting, real-world projects.
So, what’s next? Keep experimenting. Keep asking questions. And most of all, keep building.
You’ve completed another major milestone in your Arduino Bootcamp.
Great job!
We’ll see you in the next lesson!
Finally, if you have any questions or want to share your projects? Connect with us on X/Twitter for more tips and inspiration!
Ready for more? click Next to continue learning.
